Feeds:
Posts
Comments

Remember when I begged for clothesline advice? I was lamenting the lack of dryer hook-up at the little brick house and trying to convince myself that there is something sweet and natural about line-dried clothes… and really there is. I do like using a clothesline; I just like it LESS as the days get wetter and colder.

baby clothes on line

Here’s what happens when you have several wet days in a row and really need to do laundry:

clothes hanging in garage

clothes on bed

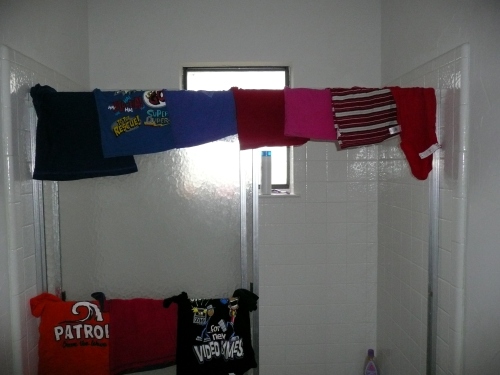
clothes over showr

They end up on the bed, over the shower, and in the garage. The only thing missing was socks draped over an old radiator.

There were some other issues with the clothesline – like the fact that it was old and rusty. There’s just not much to be done about rust on your church clothes. So Danny bought me a new clothesline. This one is braided polyester cord and it works splendidly. No rust.

hanging new line

cutting old line

Here you can see the oxidizing metal one contrasted with the nice white rope one:

metal clothesline

rope clothesline

The only drawback with the rope is that, unlike the old steel one, it tends to stretch and sag. But I’ll take that over rust any day.

I still plan to write an exhaustive “how to maximize your clothesline” post. Be watching for it. Oh and feel free to leave clothesline advice in the comments!

What kind of clothesline would you prefer? What would you do with wet laundry on those rainy days?

Thanks!

Since it’s that time of year and we haven’t done it publicly yet, it’s time to thank everyone who has helped us so far with making this new place our home.

Gratitude Roll

Thanks to Zach and Angela and family for helping to clean, watching kids, helping us move, and letting us borrow a trailer.

Thanks to Gary for helping us move and letting us borrow a trailer and for offers of more help.

Thanks to Deva for watching kids, cleaning, sweeping up the messes I made while scraping off the old ceiling texture and for bringing the trampoline down from Missouri.

Thanks to Amanda for watching the kids and scrubbing a bathroom.

Thanks to Josh for letting us borrow a truck and for helping to get the tractor running.

Thanks to Jerry for helping look over the house prior to us making an offer.

Thanks to Kevin for moving the air conditioning pipes.

Thanks to Roy for installing new tub and shower valves.

Thanks to my dad, Danny, for coming down and watching the kids while we painted their room.

Thanks to Vanessa’s dad, Dan, for building a picnic table and benches and hauling them up to us.

Yes, we do have an abundance of Danny/Daniel’s in our family.  To be accurate, I’m actually the only Danny.  There’s also another one, my mom’s brother, which is why I grew up going by Danny Joe.

Thanks to Lois for helping to clean and putting together a group to come help, even though we didn’t end up using them.

Thanks to Melissa for cleaning the house we moved out of.

Thanks to all of you reading this blog.  It’s nice to know it’s not just us reading it.  If you like it feel free to spread it around.

Thanks to my wife that was willing to go down this road even though the house looked rough to start and needed a lot of work.

Most of all, thanks to God for blessing us with this house, for the ability to do the work on it, for the job that allows us to afford it, for the friends and family that have helped us on it, and for so much more.

Hope you had a happy Thanksgiving.

What are you most thankful for right now?

Our family Thanksgiving is at our house this year in spite of its half-remodeled state and I’m excited to host it. But I couldn’t do it without at least a little decorating. We have absolutely nothing hung on the walls, we’re walking around on awful 80’s carpet, the baseboards are off, there are building supplies stacked halfway to the ceiling, but I was determined there would be at least a pumpkin somewhere.

So I created four little vignettes – one on the mantel, two on the end tables beside the wood stove and one outside the front door:

thanksgiving mantel

front entry decoration

I’ve been reading a lot of Houzz, Cultivate and YHL, so I’ve been soaking up a lot of style tips (not that I’m necessarily successful, but I’m trying). Many of these sites preach “less is more” and “casual simplicity.” So I tried to choose a few things that worked with fall colors, created varying heights and had personal significance and here’s what I came up with for the mantel:

mantel close up

My dad built the old red frame you see there. It’s made from driftwood that washed up on the beach near where I grew up (a designer would be so proud – sentimental value and repurposed materials). The books are bibles that I love, the basket came from a mission trip to the Philippines and the red bottle was a wedding gift five years ago.

And I do kind of love the little gourd as the sole official salute to Thanksgiving:

small pumpkin

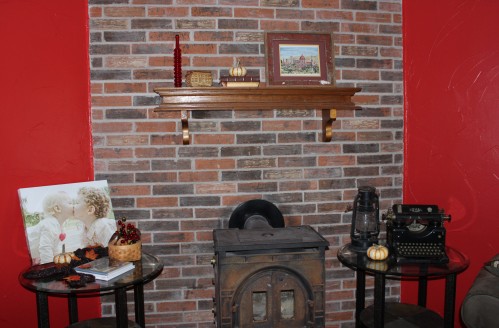
Remember when we first got the house and made all these great finds? I’ve finally managed to display a couple of them! I cleaned up the old black lantern and dusted the gorgeous Royal typewriter, plopped them on an end table, added a little pumpkin and I was done. And I think it looks great:

vintage typewriter lantern

On the other side of our cute old stove, I leaned an adorable canvas I have been dying to hang but haven’t because we’ve been painting every wall in the house. I added three photo books of our family. From there I wasn’t sure. I threw in some fall leaves and a basket, then a warm brown scarf and some berries.

decorations with scarf

It just wasn’t working for me. So I reminded myself that less is more and took off the scarf and berries. Now I like it much better:

decorations without scarf

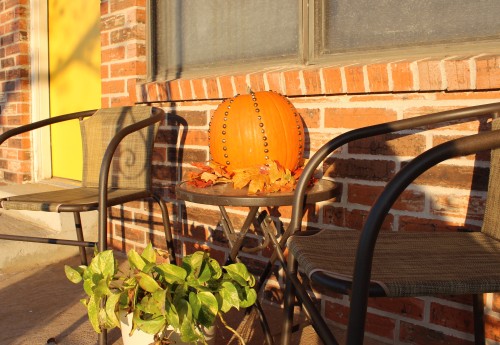
And outside, the kids and I studded a big orange pumpkin with brass tacks. We wrapped a little fall garland around the bottom and that’s our front entry decoration.

brass studded pumpkin

There are a few other touches scattered around here and there and there will be a few more on the day of our family dinner, but now you’ve seen most of my fall decor. Next year, I’ll decorate again, but hopefully in a substantially completed remodel!

Happy Thanksgiving everyone. May the blessings continue to flow.

What do your decorations look like this fall season? Do you go all out or keep it simple? Feel free to post pictures on our Facebook page!

Faucet-nating

Yes, I know the title is a stretch for a pun, but you have to imagine it with a high society British accent and it gets closer.

After I removed the old faucet and the sink was installed the next day, it was time for the new faucet.

We decided to go with this AquaSource faucet in polished chrome:

AquaSource faucet

One requirement was that it was fairly inexpensive since we didn’t want to spend a whole lot on it.  Even bigger than that, though, was that it had enough room between the water stream and the back of the sink.  You know those faucets that don’t stick out very far and are so close that you can’t hardly wash your hands without rubbing all over the back of the sink?  Yeah, not a fan.  So we wanted to make sure to avoid that.  Yes, we measured the existing ones and then measured the displays at Lowe’s to make sure it stuck farther out.

The faucet installation was pretty easy.  The parts included were the faucet itself and the plastic nuts that go  under the sink to hold it in place:

Faucet Parts

I had to get some piping and other parts to complete the installation:

Parts

There are different options for the water supply piping, but I chose to go with the plastic tubing rather than the braided stainless steel mainly because of cost.

After attaching the faucet to the sink and making sure it was straight, I attached the piping to the faucet with some more plastic nuts (sold separately).  You can see the white nuts in this pic:

Piping

Since it was a little long, I trimmed it off rather than try to wrestle it into position.

The connection to the supply valves used another compression fitting like I talked about when installing the valves.  And all done:

Piping fitted

So now we had a working faucet once again.  Only problem was we didn’t have a working drain.  That installation was a little more complicated since the drain in the sink was farther out from the wall than the last one.  Somehow I didn’t get any pictures, but to fix the problem I had to add a coupling and some more pipe to bring the drain farther out.

So here’s our shiny new faucet installed:

Faucet installed

We actually left the protective plastic on the sink since we still had to texture and paint the walls, but finally got that done and the sink cleaned off.  More pictures on that later.

Do you have a pet peeve (like the faucet being too close to the back) about bathroom sinks?

Drip, Drip, Drip

That’s the sound that started when we had our counter replaced in the master bathroom.  We had it done at the same time as the shower was installed and they were supposed to give us a couple of days notice.  Since they didn’t call until that morning and didn’t tell us to have the existing faucet and drain unhooked, everything was still connected.  The installers typically don’t mess with plumbing, but decided to try it to save a trip.  As he started to turn off the valve to the sink, it started dripping.  It can happen with old valves.  The packing (a material to help prevent leaks) and gaskets inside get old and stuck in position.  Everything’s fine until you turn the valve and it all breaks loose.  So they didn’t get the sink done then.

I was kind of torn on what to do.  The plumbing in our house is all copper pipe as most older houses are and I had never sweated copper together before.  I was a bit hesitant to try, but decided why not, that’s what this is all about.  So, I did a little research on how to sweat pipes and then came across something else.  A compression fitting valve.  It has a thin piece which gets wedged between the valve body and the pipe to hold it in place without sweating.  Not a professional installation, but it would be quicker and work for me.  I stopped at Lowe’s (once again) to pick up some new valves and other parts.

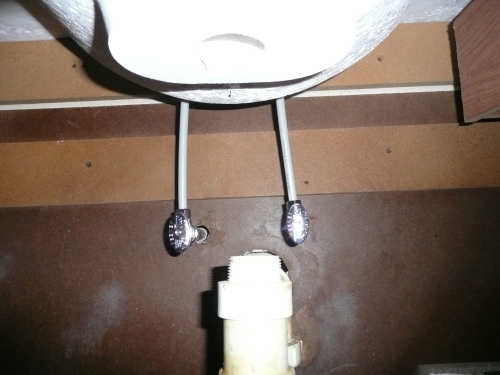
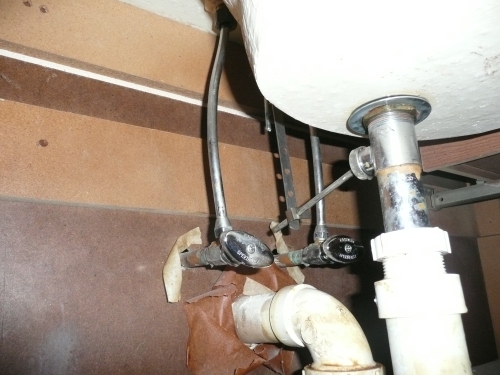
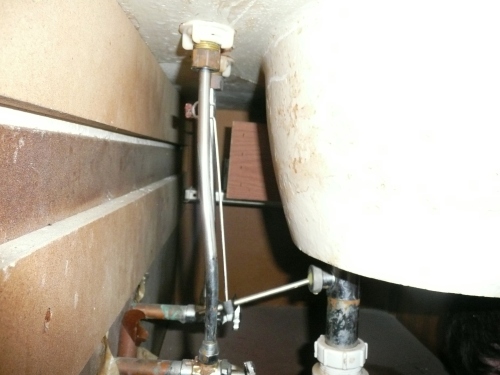
Of course, the valves are always at the back of the cabinet in the hardest to reach places:

Old valves and pipes

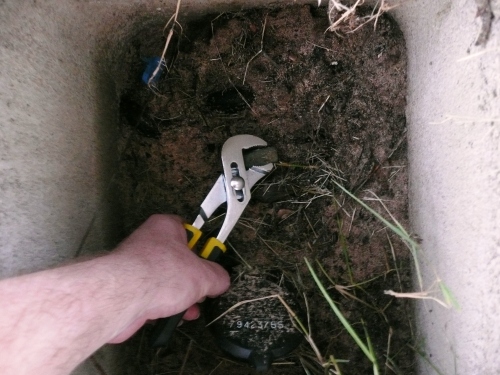
First step was to go turn off the water to the whole house:

Turning off water

Sometimes this can be done with a valve right outside the house.  Our house has one of those, but it seems frozen and I was advised by the plumber who redid our shower valves not to force it since it’s old and it might leak.  So I had to go out to the valve where it comes off the main water line.

Since the old sink was coming out anyway, I decided to take it off to work on the valves to have more room.  First, I had to unhook everything from it.  If the valves look hard to get too, the piping going to the sink itself is even worse:

Water tubing

Most of these pictures were done with the old camera and here’s the shutters getting stuck like I mentioned as one of the reasons that we wanted to replace it:

Old camera

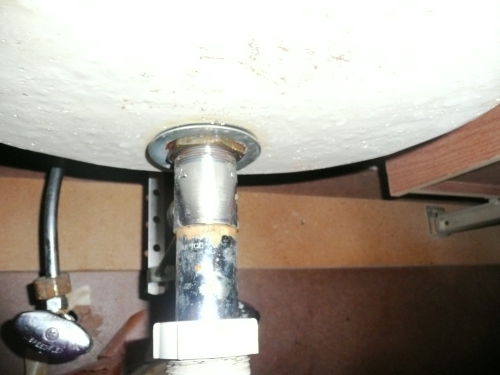
Fortunately, removing the piping doesn’t require special tools, just some finagling with a wrench.  Although, I did see a tool at Home Depot that looked like it would make things quicker.  The drain is even easier:

Drain

It just has a plastic nut that unscrews from the pipe and then everything could be lifted out.

I say that as if just lifting it out was very easy.  It wasn’t.  I didn’t realize how much those sinks actually weigh.  They’re not screwed down, because they don’t have to be.  They’re not going anywhere.  This one was 4’ long and weighed 108 pounds.  That’s almost like trying to carry Vanessa except a little harder since the sink wouldn’t wrap its arms around me and help out.  The hard part is that I couldn’t just tilt it out the front since there was a notch cut in it to go around the door trim.  I had to tilt it up on its side a little to get it past that.  But I got it out:

Sink removed

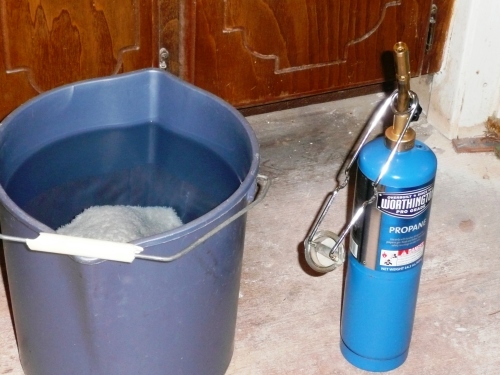
Now the fun part which requires this:

Tools

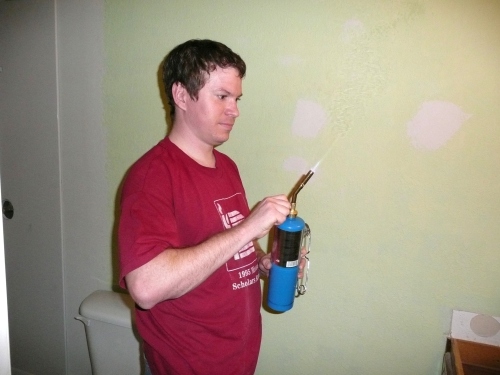
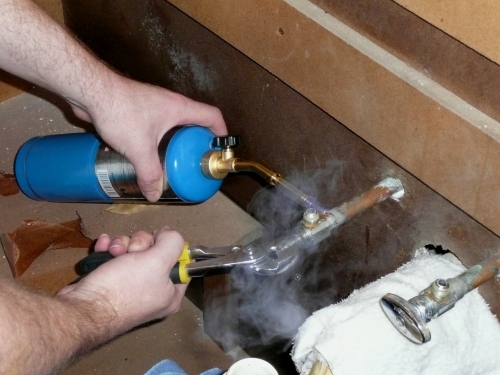
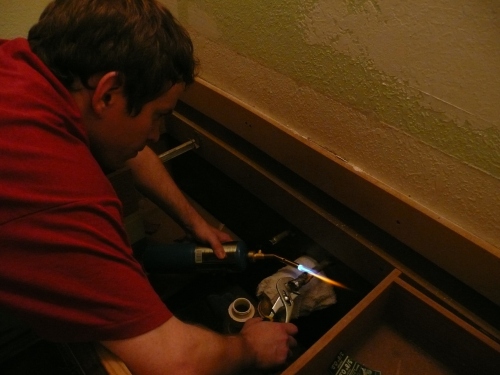
Time to take the valves off.  I decided to just remove them instead of cutting the pipe and making it shorter in case I needed the length some other time.  To do that, I had to heat the pipes up hot enough to melt the solder.  It’s not really that difficult, just turn on the gas and use the striker to light the torch:

Lighting the torch

Then turn it down until the flame is all blue to get the most intense flame:

Good flame

Finally, heat up the valve until the solder melts and it becomes loose enough to pull off:

Removing valve

You’ll get a little steam and some smoke as it burns off old dust and such so it would probably be best to use a mask.  Also, a wet rag placed on pipes or cabinets or other wood will help protect them.  Here’s a better picture showing the flame:

Better flame

Sweating the valves on uses a similar heating process, but parts of the valve may be removed to avoid having the heat destroy them.

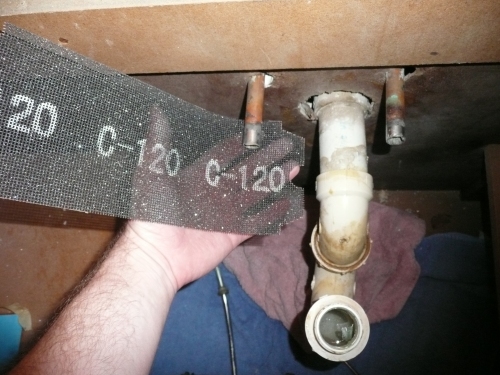
After I removed the valves, I heated the solder some more and quickly wiped it with a wet rag to remove as much as I could and then I sanded it down smooth before installing the new valves:

Sanding pipes

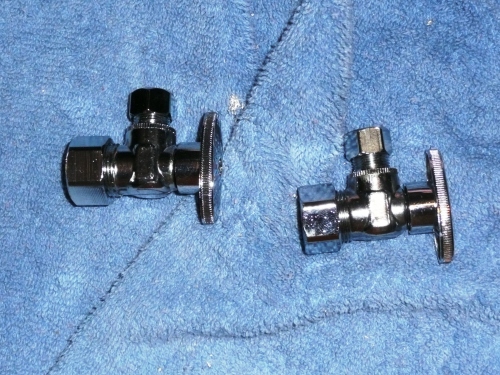
Here’s the compression valves I was using:

Compression valves

Of course you want to make sure you get ones with the inputs and outputs pointing in the right direction.  For sinks, this typically means they are pointing 90 degrees from each other.

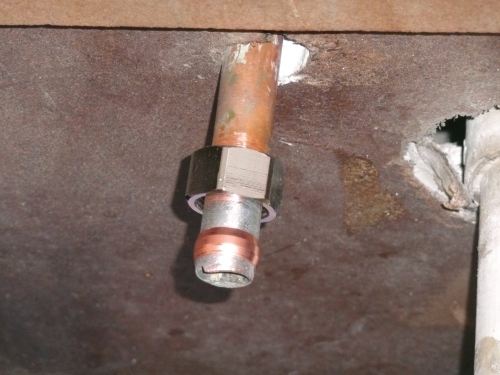
Removing the big nut exposes a little copper band called the ferrule.  Don’t lose it!  This is the part that gets sandwiched between the pipe and the part of the valve that goes over the pipe and gets compressed when you tighten the nut and holds everything together.  The nut goes on the pipe first, then the ferrule, then the valve:

Nut and ferrule

I also used some plumbers tape wrapped around the threads of the valve to help seal it against leaks:

Plumbers tape

Another option is thread sealant which is messier but may provide better results.

I tightened everything up and I was done.  Shiny new valves:

New valves installed

Then of course it was time for the test: turning the water back on.  Big suggestion: make sure the valves are in the off position before you do this.  If they’re not, you’ll probably have water shooting to the ceiling.  Thankfully this didn’t happen to us, but I can almost imagine Vanessa’s reaction if it had.  That would have been something to see.  It also helps to have someone watching for you to scream at you to turn it off if something is wrong.  So, Vanessa watched while I went back outside to turn the water on.  Success!  Mostly.  No big leaks, but I did have a little drip.  I just had to tighten the nut some more and all was well.

There you have it.  A change-out that wasn’t planned but was made necessary by one that was.  The next day, the guys were able to install the sink and continue on.

Have you ever had a big water mess from something like a valve being in the wrong position when the water was turned on?

Ah, the Colors of Fall

It’s Fall, the temps are dropping, and the leaves are changing colors.  At least that’s what is happening in other places besides Texas.

But at least there is some coloring going on.  We’ve painted the kids’ room!

Since it had paneling on the walls and didn’t suffer the same problem of needing the drywall patched, we didn’t have to worry about retexturing the walls.  We thought about it a little, but decided to save the headache and just let the walls be different from all the rest.

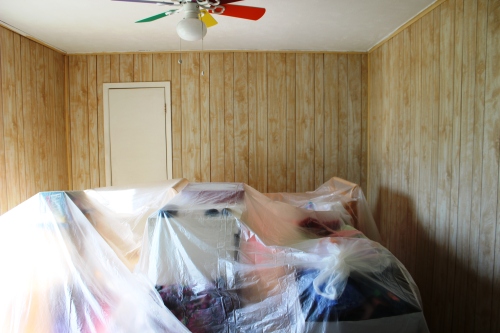
Of course, before we could even get started, we had to make a little room to get to the walls:

Everything covered

We moved the toddler bed for Baz and the pack-n-play for Jane into our room.  I’d take a picture, but our room’s a general mess right now anyway, so suffice it to say, it’s kind of cramped.

Back when were cleaning up the house to move in, we had wiped down the paneled walls with TSP to degloss them and help the paint to stick a little better so we didn’t really have any other prep work to do.  I trimmed out while Vanessa rolled:

Trimming

My dad was down for a couple of nights so Vanessa and I were both able to work on this while he watched the kids, but it still took most of the day since we started a little late, had to get everything moved, and the trimming took a while because I had to get enough in all the little grooves, but not so much that it ran down the wall.  With three doors, a big window and the inside of two closets to trim out, that a lot of trimming, but we finally got it all primed:

All primed

It did take long enough that we decided we weren’t going to do anything else and give dad a break with the kids.

Monday, I got the room all trimmed out with paint:

Paint cut in

We decided to go with Sand Swept by Valspar in semi-gloss from Lowes:

Sand Swept by Valspar

I guess, more correctly, Vanessa decided to go with it.  I pretty much let her make most of the color decisions.  That’s the color we’ll be using in most of the rooms.

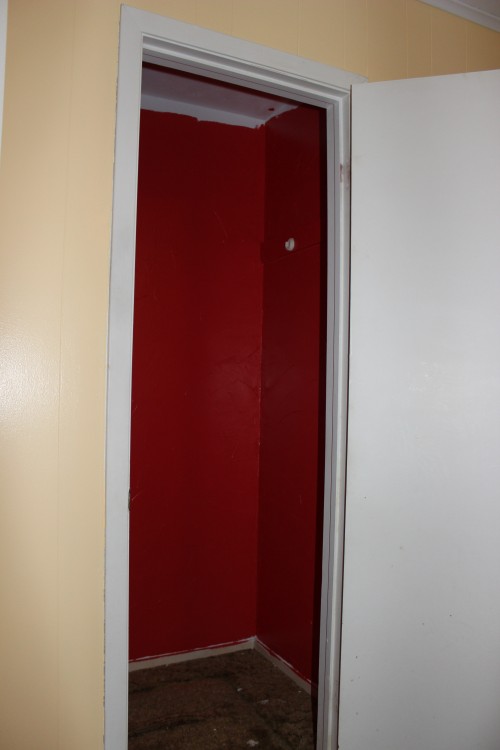
We ultimately decided to paint the closets a different color since Baz kept saying he wanted a red closet.  So while I was at work on Tuesday, Vanessa and Baz tackled painting his closets while Jane slept:

Baz Closet

They couldn’t quite reach the top to trim it without the ladder, so I get to finish that up.  The color used there is Autumn Fire by Valspar:

Autumn Fire by Valspar

Tuesday night I got the rest of the room painted:

All painted

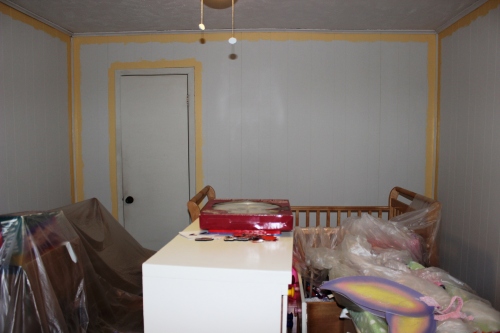
At first, we were going to leave all the trim white, even the small corner pieces, but after painting the walls it just wasn’t working for us.  The picture makes it look better than it did in person.  I went back through and painted the corners:

You’ll have to ignore the slightly tilted look to those pictures.  Apparently, I need to learn how to hold the camera straight.  Or get out the tripod.

One other thing we noticed after painting, is the that the trim around the window doesn’t quite work either:

Window Trim 1

Here’s a closer view:

Window Trim 2

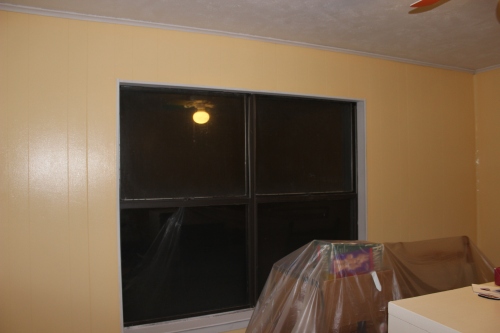
When it was all paneling and that light beigey-browny wood color, it didn’t stand out much, but after priming and painting, the white trim on the yellow wall just it big enough.  The size doesn’t fit.  Maybe we’ve been reading too much on houzz.com about things like correct trim sizes, but we’ll probably be changing that out to something more fitting for that large of a window.  We’ll also be painting all the trim and doors in glossy white, but will probably wait until we are ready to do more of them.

For now, we just need to get the other closet painted and let everything air out a little and get the kids (including the dog) moved back in.

One last little teaser.  The bathroom walls have also changed colors as well as texture.  Remember the green color before we deconstructed the master bath:

Baz Helping

Well, we’ve managed to get some texture on them (we’ll tell what we did and how later) and got one bathroom primed.  So here’s a glimpse of how they’re looking now:

Bathroom Preview

What finish of paint do you prefer on your walls: flat to hide imperfections, glossy for the ease of cleaning or eggshell, satin, or semi-gloss for somewhere in between?

Color sample pictures are from Lowes.com.

Say Cheese!

We did it.  We finally splurged and went ahead and bought it.  No, not some wildly expensive aged cheese from Italy.  A new camera!

Up until now we’ve been using this old Panasonic Lumix for all our family pictures:

Old Panasonic Camera

Not to say it hasn’t been a good camera.  It still functions, but it’s over 5 years old, has been to London, Italy, and Hawai’i, and as you can see the lens cover doesn’t fully close anymore.  Most of the time, the top part isn’t down;  here you’ve seen a rare 3/4 closed appearance.  Because of that not closing, dust tends to get on the lens and we get shots with white fuzzy dots like you can see in a couple of pictures here.

With the blog and the approaching birth of a new baby we decided to upgrade.  We chose this:

The Canon T3i.

We tossed back and forth between Canon and Nikon (well I did actually, Vanessa didn’t really have much of a preference and left most of the research up to me).  I ultimately decided on the Canon since the autofocus is built into the camera and not the lens and for some of the video capabilities.

With it getting this late in the year, I wrestled with waiting until the Holiday sales came out hoping the price would drop, but then woot.com ran it as one of their daily deals so we went ahead.

It will take us a while to get used to and learn more about it (we didn’t fully utilize our old one, but who does), but hopefully we can improve the quality of pictures we show you all.  It has a little wider lens that allows us to get fuller shots of a room.  It has better low light capabilities, which is nice when shooting inside most of the time.  And we also got a tripod to help avoid any blurry shots.

Plus we can more easily shoot shots like this:

Baz up close

and this:

Jane Chocolate face

It handles motion better so we can get the kids being tossed by Grampy:

Grampy and kids

And even Tigger, although he moved a little too fast:

Tigger jumping

But the first pics we took with the new camera were of one of the main reasons for getting it: the new baby (still in the belly of course):

Vanessa belly pic

Do you have a point and shoot, or a DSLR, or do you just use your phone?  Do you like it?  How much of the functions do you use?

A silicon!  What can I say, I had a chemistry teacher in high school with an unusual sense of humor.  But I’m not talking about the element silicon today.  Instead I’m talking about silicone.  That nice nasty stuff that nobody likes to mess with since it can be so messy, but is necessary for your bath.

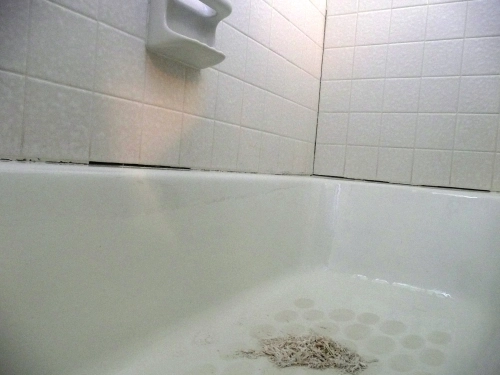
The joints around the tile in our main bathroom looked kind of like this:

Hole in silicone

Of course a hole in the silicone in your bath is not a good thing.  Water can get in there and do all sorts of bad things like rot wood or mold.  So we needed to get it replaced pretty quickly.

The first thing I did was take a box knife and cut down both sides of the existing silicone:

Cutting out old silicone

This freed it up a little bit and allowed me to pull out most if it in a strip:

Removing old silicone

There’s always still lots of pieces left stuck to the walls and you want to get things as clean as possible so the new silicone will stick.  One way to do that is to use a blade from the box knife to scrape it off:

Scraping off old silicone

There are also scraping tools available that will hold a razor blade in a similar position to make it easier, but I didn’t have one of those handy.  An additional step is to use mineral spirits or some cleaner to get rid of all the other dirt.

After all that cutting, pulling, and scraping, I had quite the pile:

Pile of silicone

And the joints were all cleaned out and ready to go:

Silicone cleaned out

You can still see some stuff in those joints.  That’s even older caulking that I left in there to provide a backing for the new silicone.  If you try to fill a hole much wider than a quarter-inch or so and it’s deep, it gets pretty hard to make it nice and smooth without a backing of some sort.

Now, what to fill it with.  There are two options people use: acrylic caulk and silicone.  Acrylic is much easier to use and clean up, but that’s about the only advantage it has.  Silicone requires mineral spirits to clean off, but is much better to use in a bath.  The best thing to do is keep an old rag handy for wiping up mistakes.  Silicone is impermeable to water while acrylic isn’t, so the water won’t get past the silicone.  Silicone will also stay soft and flexible while acrylic will get hard and crack with time.  Silicone is also more resistant to mildew so it’s easier to keep clean.  However, you can’t paint over silicone.  If it says you can, then it’s probably not 100% silicone.

So, I decided to go with 100% silicone.  Fortunately, you can get it in white.

One of the trickiest parts is applying the silicone with a caulk gun:

Applying silicone

The trick is to get the hole in the tube just the right size.  I either tend to get it too big and have too much come out at once or to small and it takes forever and gives my forearms a real workout squeezing the trigger.  If you get too much, then it’s hard to get it smoothed out without it squishing out everywhere to the sides.  Too little, and it won’t fill the crack and it’s hard to go back over it to add more without making a mess.

After you get it in the joint, it’s time for smoothing.  No tools needed for this, although there are some you can get.  All you need is your finger:

Smoothing out silicone

It’s best to smooth it out all in one line if you can.  That will keep it all the same level and smoothness.  Dipping your finger in water will also help.  If it takes too long to apply the silicone, then the first part can start drying on you if you’re not careful and make it hard to smooth out.  Yes, it will get all over your finger, but that’s where the old rag comes in handy.  Some silicone may remain, but it won’t really be noticeable and will wear off in a day or two.  I did have to put my contacts in with a different finger, though.

It may take a few hours to a day to dry completely depending on the brand, but then it’s all done and looking good:

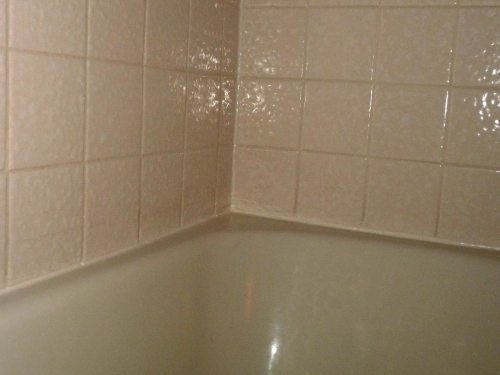
Finished silicone

Have you ever had to reapply silicone in the bath?  Did you keep it neat or make a mess?

I have a clothesline. This is new for me. Sure, I’ve hung clothes out to dry before, but I’ve never used a clothesline day in and day out. The little brick house has no dryer hook-up at all, so Danny will have do some electrical work before we can even use our dryer. He’ll have to add a breaker to the panel, run the wiring, and figure out if/how we want to cut a hole in the brick to vent it. So for now, we have a nice double clothesline and we USE it.

clothesline sky

(I like that picture; I think it’s just the blue of the sky and the fact that Baz took it.)

When we first moved in over the summer, it was kind of fun and novel to hang clothes on a line. The hot Texas sun dried the clothes before I even finished hanging them and of course they have that nice outdoorsy smell. I could hang clothes while the kids played in the sandbox or cooled off in the house and it was usually a few minutes of calm (not counting the many times I got interrupted by someone crying). There was a loveliness about it.

hanging clothes

I like to think that even after we get the dryer hooked up, I’ll still do lots of drying on the line, especially in the summer. But we’ll see.

As we move into fall, I can see that a clothesline gets a little more challenging. The weather is not always cooperative and the clothing will get thicker and harder to dry, especially on those cool, cloudy days. I will admit that I wrinkled my nose a little at the clothesline the previous owner had strung across the garage. It seemed so… haphazard. Now I see the appeal. I will probably have a garage line of my own before long.

ASKING FOR ADVICE. On to the whole reason for writing this post. I need advice from seasoned clothesline users. How do you maximize your clothesline? (I totally see a future post with that title using all the advice I garner from readers.)

How do you hang clothes to dry them fastest? Why are some items usually hung upside down? Does each sock get its own pin? What can you do about rust on your line? Do you leave the pins on the line or take them off? What do you do when the weather won’t let you use your clothesline?

Any advice I can gather would be great. Using a clothesline seems like it should be pretty self-explanatory. You get a shirt and stick it up there with clothespins. But I feel sure that there are “best practices” with a clothesline that I (newbie that I am) just don’t know.

clothespin in mouth

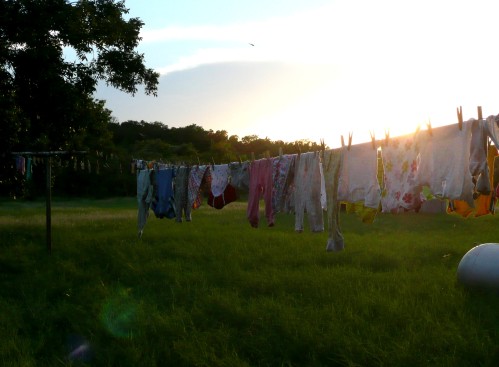
A clothesline does not seem all that great when it’s raining out and my husband has no clean socks, but most of the time, it’s pretty nice. And there is something really nostalgic and sweet about a load of baby clothes on the line in the setting summer sun:

baby clothes on the clothesline

So lay it on me: what are your top tips for clothesline use?

Bathroom Reconstruction

After all the deconstruction we did on the master bath in Phase 1, Phase 2, and Phase 3, it was finally time to start reconstructing it.  This post is loaded with pictures, but there’s  a lot of different things that went on to get the bathroom put back together.

First, I had to get rid of the old drain that I had left when cleaning out the old tile:
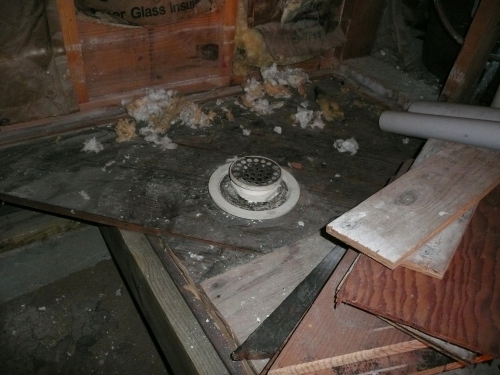
Shower drain

Of course, this meant going back under the house.  That wasn’t too bad since the pipe I needed to cut was right beside the hole that I had cut in the floor:

Shower p-trap

I cut it off the pipe above the p-trap (so I didn’t have to replace that):

Cut off drain

then installed a coupling and some pipe to get above the floor:

Pipe and coupling

I left about 5″ sticking above the floor so there would be enough no matter what type of shower we decided to put in.  The extra would be cut off when the shower floor is installed:
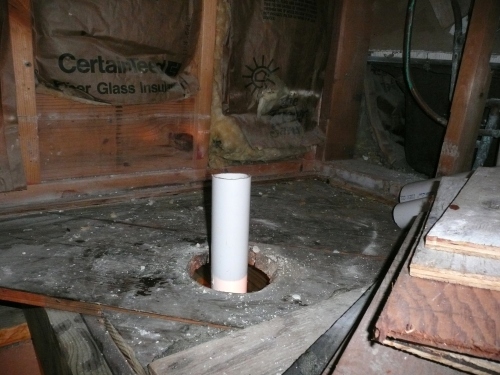
Cut pipe

After that, I laid down the 1″ x 12″ pieces that I had originally cut out from the floor:
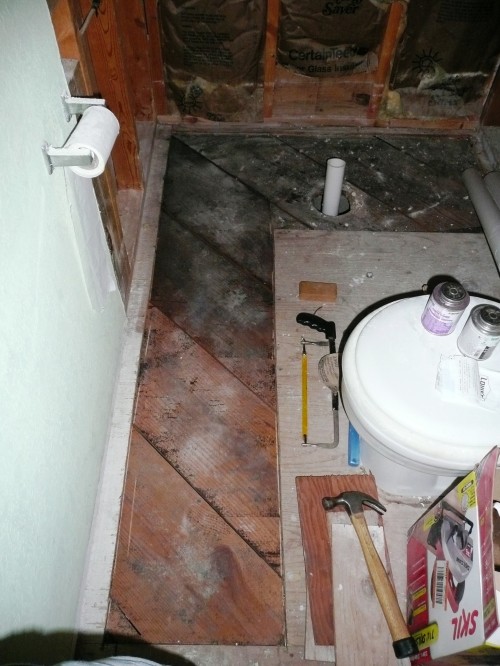
1 x 12 down

and nailed it down with the nail gun:

Nailing 1 x 12's

The exhaust from the air gun stirred up a bit of dust and the camera flash reflected it nicely so it looked like it was snowing inside:

Dust stirred up

Next, I had to replace the plywood that I had taken out.  The old plywood didn’t come out in one piece, so I had to cut a new one in an “L” shape.  The best way to mark that out is to use a chalk line:
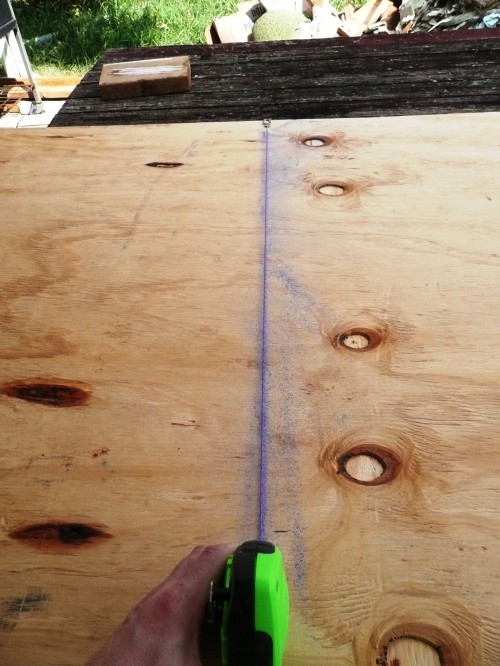
Striking chalk line on plywood

Here it is all cut out, including the hole for the drain pipe.  Don’t want to forget that.  I did have to adjust that hole a little after getting the plywood down, though:

Plywood cut out

Sometimes it can be hard to get a piece like this to fit just right, but this just dropped on in:
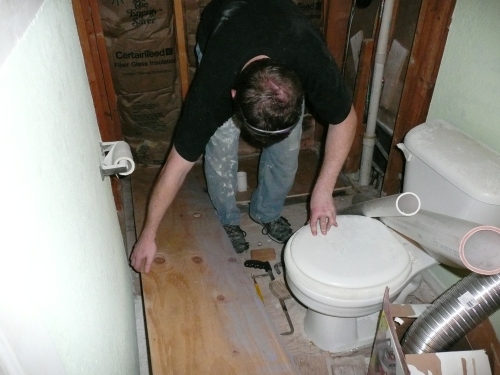
Putting plywood down

Okay, so maybe it was a little tight:

Tight fit

Well, maybe it was really tight:

Really tight fit

I ended up have to trim a bit off to get it to fit.  My original cut when I removed the old piece wasn’t completely straight so there was a little bump out in the way.  After that, I screwed it down with deck screws that are rated for outside so they could handle any moisture being attracted from underneath the house since the old nails were half rusted through.  I also screwed down a few spots of the plywood that I didn’t replace to keep it from squeaking.  All done:
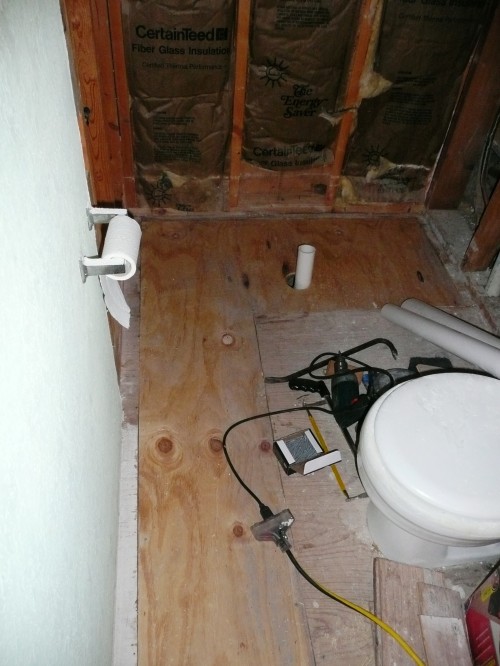
Subfloor complete

Yes, that is the same toilet paper roll I mentioned at the end of the Final Deconstruction post, but don’t worry, it is finally gone now.

Yay!  No more going under the house for me!

The next thing I needed to do was install an exhaust fan.  This bathroom is pretty small and there’s no window so the humidity levels will get pretty high.  An exhaust fan will vent that and help to cut down on the possibilities of mold or things getting damaged from all the moisture.  We decided to go with this Broan fan from Lowe’s:

Broan bathroom fan

We liked the fact that it wasn’t the standard big white square.  It can also be found at Home Depot under the NuTone brand.

I decided to put it close to the edge of the existing sheetrock so I could install it from in the bathroom while I had the ceiling open rather than having to crawl in the insulation in the attic:
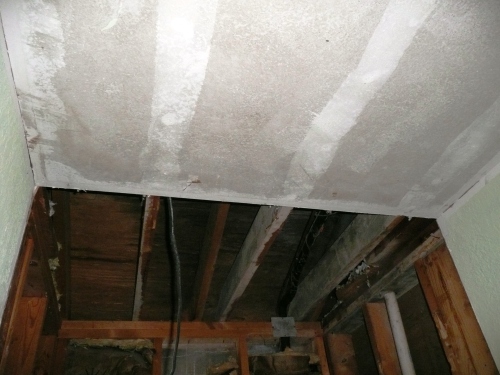
Ceiling ready for fan

I set it up on top of the ceiling to mark the locations for the hole and for the screws that would hold it:
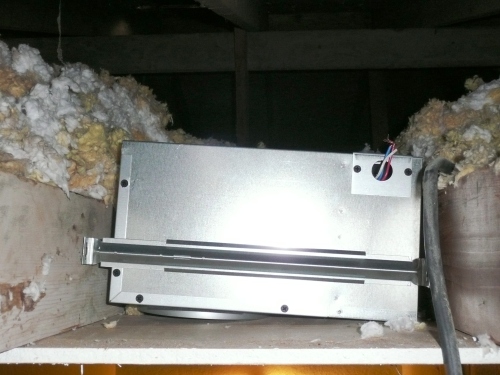
Marking location

Since you can see the wires sticking out of this side, that means the vent is on the other side so I had to fasten the exhaust duct over there.  It was a bit awkward, but was easier than trying to wire on the other side.  Speaking of wire, that black wire on the right is the power wire from the switch.  It was already in place for the light that was above the old shower so I didn’t have to install any of that.

Here’s the little saw I used to cut the hole.  It’s handy, but kind of dull and a little bent so it still took some work:

Cutting ceiling sheetrock

I guessed I skipped taking anymore pictures until this one.  Here’s the installed fan from below, minus the white reflector:
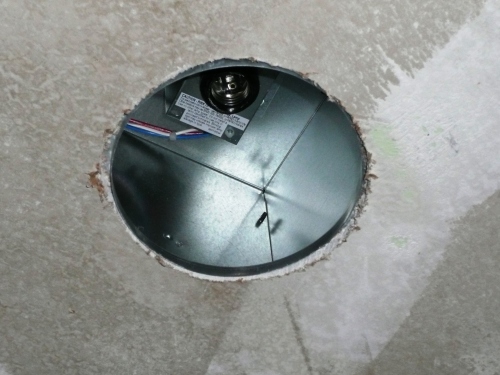
Fan installed

After all that, it was finally ready for drywall.  I added some insulation back into the ceiling and a couple of areas on the wall first though:

Walls to be sheetrocked

The photographer changed for some of these next few pictures.  Since I couldn’t take pictures of myself, Baz took most of these.  Vanessa was at the store or something.  Not bad for a 4yr old.

I originally had bought cement backer board to go up in the shower.  At first, we planned on tiling it and the cement board is a better option to put on the walls rather than any type of drywall.  This is in case any moisture works its way through any of the grout and mortar of the tile or even the tile itself.

Since we changed (I think we did that at least twice) and decided to go with a synthetic (which is not water permeable) for the shower, I took the cement board back to Lowe’s and got something referred to as green board (yes, it is typically green colored).  More appropriately it’s called moisture resistant drywall and is just what it sounds like.  It stands up to moisture better than regular drywall (although not as well as cement board) but installs just like drywall which means it’s lighter and the screws go in easier than the cement board.  It’s also cheaper.

It’s typical that the ceiling goes up first:

Ceiling up first

I started out with my cordless, but had to switch to a corded drill for more power.  Makes me think I need to buy a new drill.  Good excuse anyway.

The pieces I needed for the side walls weren’t a full 4′ wide so I had to cut down the whole length.  The best way I found is to have the sheetrock standing on its side so you can work with it:
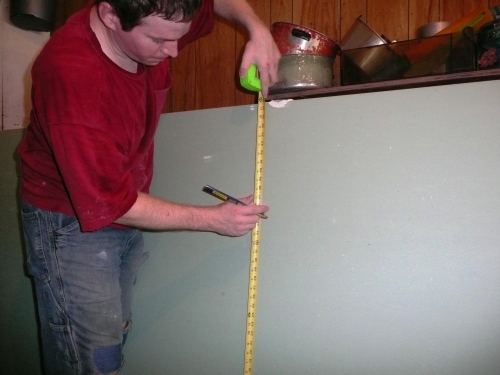
Measuring for the Wall

Since I had to cut down the long side, out came the chalk line again.  Then using a box knife, I cut down the line.  Since the knife won’t go all the way through the sheetrock this is really more of a scoring:
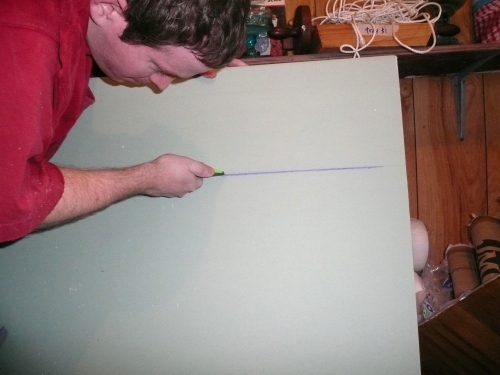
Cutting Sheetrock

And then I just bent it backwards for it to snap perfectly at the scored line and then cut through the paper on the other side:

Snap at the cut

Just like I had to do on the plywood, there’s usually some small adjustments that need to be made to get it to fit, but in goes the first wall:
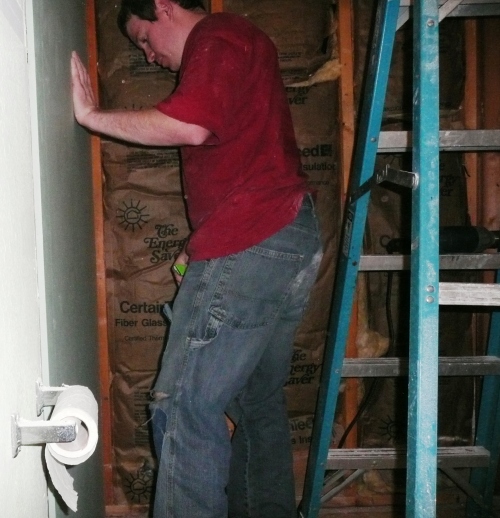
One wall

One thing to keep in mind is the wall piece needs to go all the way up against the ceiling and not down on the floor.  This will give some support for the ceiling for when it can’t be fastened close to the edge and it also makes the joint smaller and easier to mud.

Don’t forget to cut a hole for the shower fixtures:
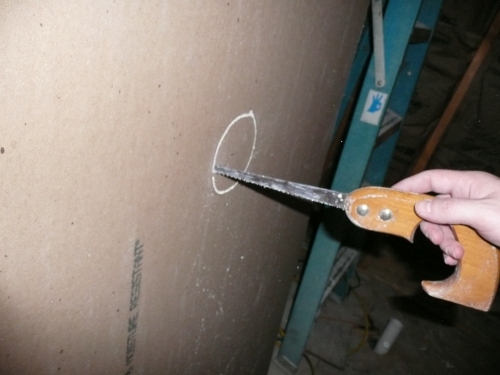
Cutting a hole for the shower fixtures

The back wall was just about the right size so I didn’t need to do any cutting on the piece.  Although, if you look, you can see that it left a little wider gap on the sides:

Finished drywall

And finally, the joint compound to cover up all the joints and screws.  Also, you can see the ceiling had already been textured when I took this:
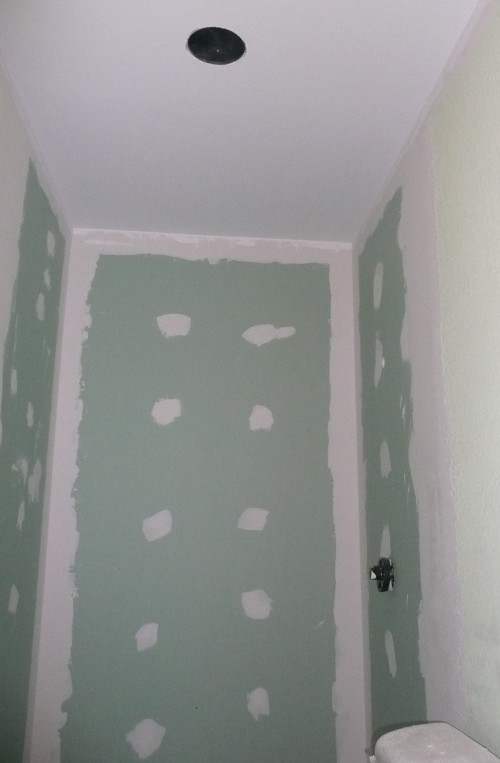
Finished joint compound

One nice thing about a small shower is that it cuts down on the number of joints that need mudding since you don’t need more than one sheet per wall.

It’s finally somewhat put back together and ready for a shower, wall texture and paint.  It’s about time!

Have you ever ended up writing more than you thought you would?  When this post started out, I didn’t think it was going to be that wordy, but it ended up about average for us.