Feeds:
Posts
Comments

Archive for the ‘Demolition’ Category

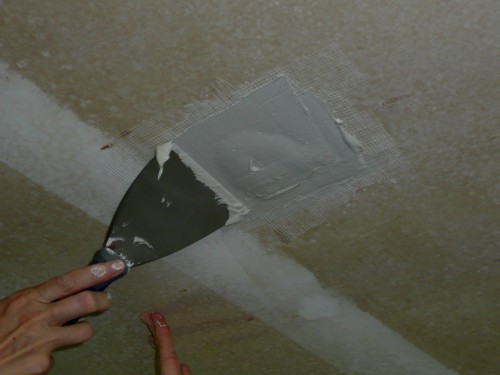
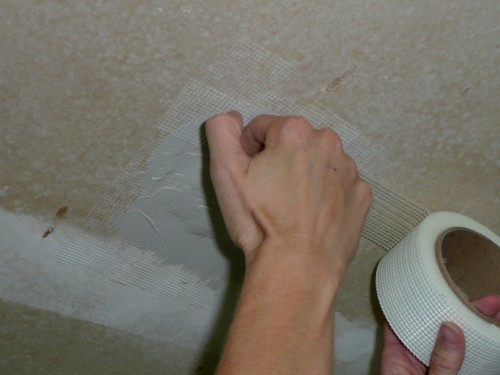
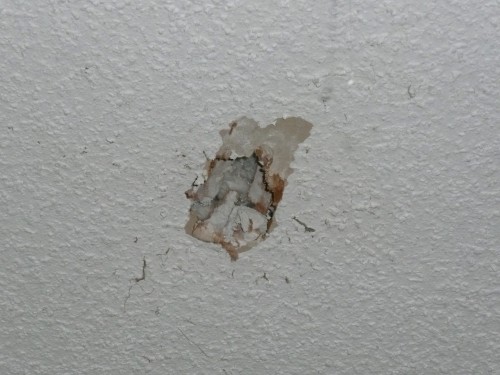
Remember when I gleefully destroyed those dated old spindles? And in the process left three ragged holes in the ceiling of our kitchen? Danny informed me that I made the mess so I could clean it up, handed me a roll of mesh tape, a box cutter, and a mud knife and sent me up the stepstool.

three holes

close up

With Danny coaching me from below, I began by cutting off the jagged edges of the sheetrock:

cutting

I then made a patch using self-adhesive mesh tape, running in two directions:

taping

mesh

Then I got muddy. I used enough mud that it sagged a bit, but we were hoping it would shrink (as joint compound does) and flatten out some. It did, but even now, if you look really closely, you can see where the patch is. Actually Danny and I can see it; I’m not sure anyone else could find it. I hope. (Danny has more on mudding techniques here.)

mud patch

Then I applied more mesh tape:

more tape

And more mud:

more mud

In the end, our mesh-and-mud patches worked fine. The mesh stayed in place and the mud covered the holes.

If all you see in this next picture is white, then you’re seeing the right thing. This is after the sad little holes have been patched, textured, primed and painted and hopefully you can’t tell at all. Happy ending to the story of the three spindles.

finished

What repairs or patches have you had to do lately? Do your current projects create more projects that have to be done down the road?

Read Full Post »

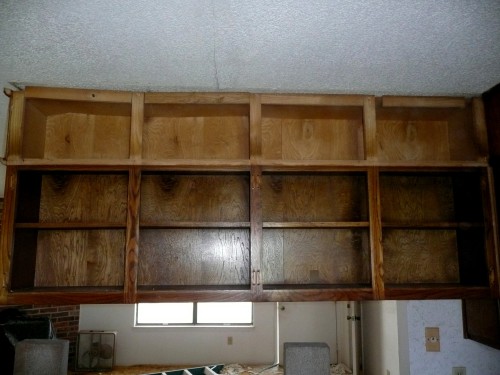
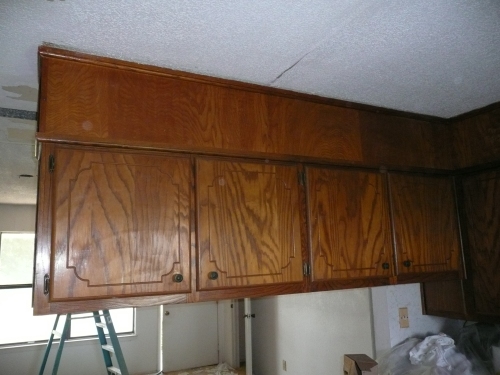
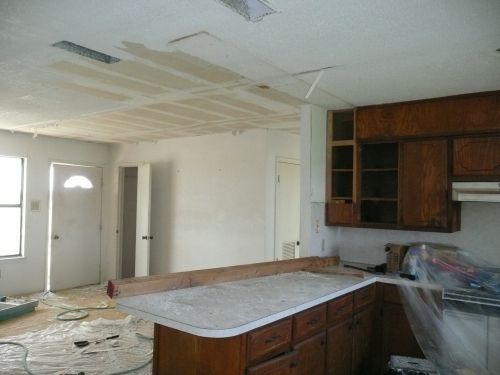
When we took you on this tour to introduce you to our little house, you probably didn’t pay much mind to the bank of cabinets hanging from the ceiling. Look there, to your left, almost out of the frame:

Or here, also to the left:

Or here, straight on:

See that shadow above the upper left portion? That’s the cabinetry sagging off the ceiling. Upon investigation, Danny discovered that the top board was nailed, not screwed, to the ceiling, and the board was beginning to pull through the nails. So Danny stood there staring at it for a minute, trying to figure out the simplest way to correct the problem, then blurted, “Why don’t we just take them down?” I agreed so quickly that I feel certain I had some deep-seated subconscious desire to banish the cabinetry.

So Danny got to work, removing facings and doors. You can see how much room we were letting go of. That’s where all those vases and bowls and trays that are in still in boxes could be right now:

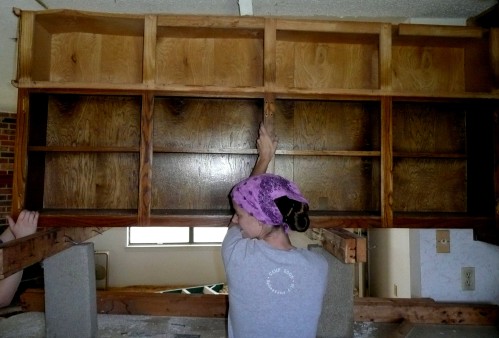
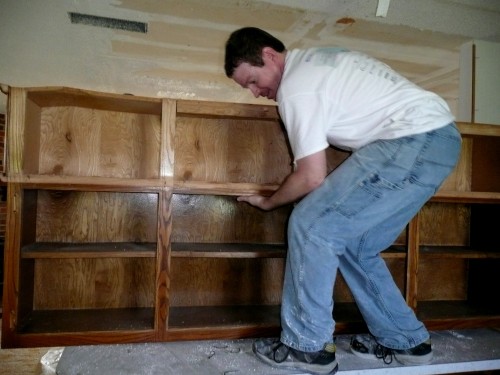
Then he braced the section of cabinets with concrete blocks and four-by-fours while I and my sister-in-law steadied it. When he unfastened it from the ceiling, it was fully supported, so there was no honkin’ piece of carpentry crashing onto our counter.

Finally, we ladies removed the supports while He-man here lowered the cabinets to the counter. I don’t know how much they might weigh, but that’s a lot of wood. It’s perty hefty.

From there, the three of us wrestled it out the back door to the back porch. Alas, we have no pictures of that little adventure. But it all ended just fine and no one dropped it on their big toe.

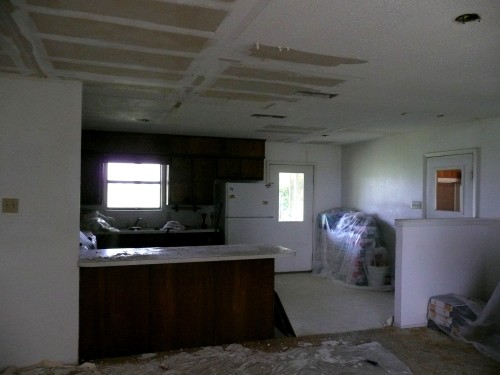
Now let’s bring back that “before” picture. Look at the difference! It feels like we knocked out an entire wall. (I know, I know. The “after” picture is dark and it’s a total disaster zone, but just look past that part). Removing those cabinets opened the room more than we ever anticipated. When Danny first suggested it, he said, “We can put it back up if we need the space.” Well, kids, we do need the space, but it is NOT going back up. We love this new, airy room.

without cabinets

Impulsive decisions are usually bad news when it comes to remodeling, but I guess sometimes, they pay off. Going with your gut. Trusting your instincts. You know, like not changing your answers on a multiple-choice test.

What bit of serendipity have you experienced in your projects? What accidental or spur-of-the-moment decisions have you made that resulted in a big difference? What temporary fix have you done that you liked so much it became permanent?

Read Full Post »

Not really, but the ceiling texture was.  One of the issues with our house was that there were a couple of spaces that looked like this:

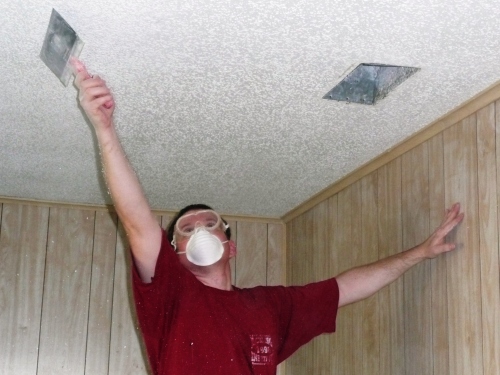
Popcorn Texture ceiling falling downThe old popcorn ceiling texture was falling down in a few spots.  There were also some areas where the joint tape was coming loose from the ceilings as well as the walls.  Of course all that had to be fixed.  I knew that the popcorn texture could be scraped off, so I grabbed a few tools we had on hand to see which one might work the best and just how hard it was going to be.  I tried a little putty knife, but it tended to dig into the sheetrock too much.  I even tried an old plastic dustpan since it was wider:

Removing popcorn texture trial

These trials were actually about 2-3 weeks before we started in on the ceilings, just to see what it was going to be like.  Nothing we had on hand was going to work very well.  So what really is the easiest way to get that texture off?  Do you scrape it, sand it, or something else.?  I checked out quite a few tutorials like this and this and found the best thing seemed to be to wet the ceiling down first.  I never would have thought of that.  I mean, isn’t spraying water everywhere in your house something you usually want to avoid?  I also thought about using the ceiling scraper tool mentioned that allows you to put a trash bag on it to collect all the stuff that falls but decided against it.  I’ve bought too many of those type of things that didn’t actually work that well and decided to save my $17 and just use a taping knife.

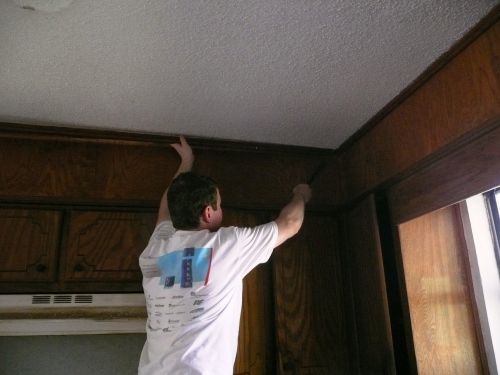
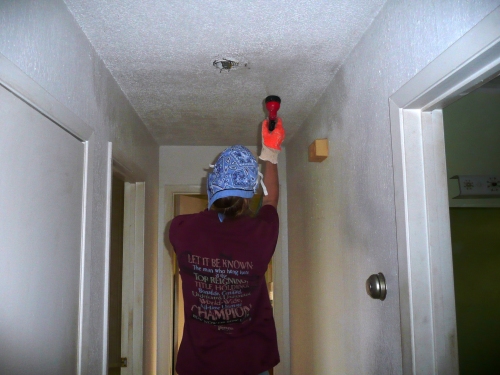
Of course, before you start anything, you want to take down all the lights and ceiling fans:

taking down ceiling fan

and any cabinet trim or crown moulding if you can:

Removing cabinet trim

You can leave these and just tape them off, but I thought it would be easier to just remove it.

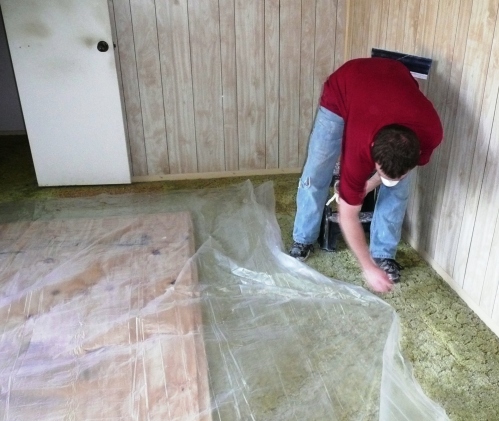
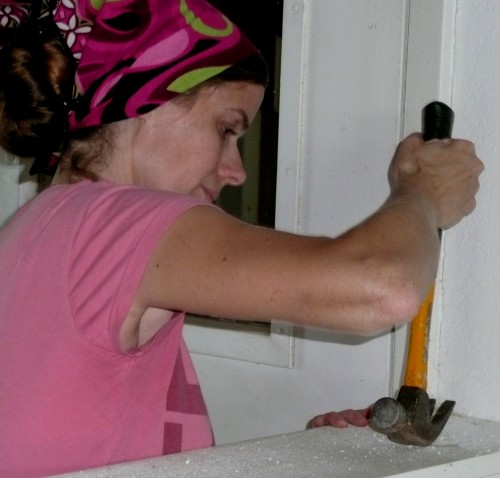
Since we are going to redo the walls and floor, I didn’t bother with taping off the walls or completely covering the floor.  It makes prep go a little faster, but clean up take a little longer.  I admit, my decision to do that was partly based on the fact that I was doing the prep and not the clean up.  It did give my sister something to do while she was visiting.  We did put some plastic down though to avoid making a complete mess:

Laying down plastic

I even had some help with that part:

Kids helping with plastic

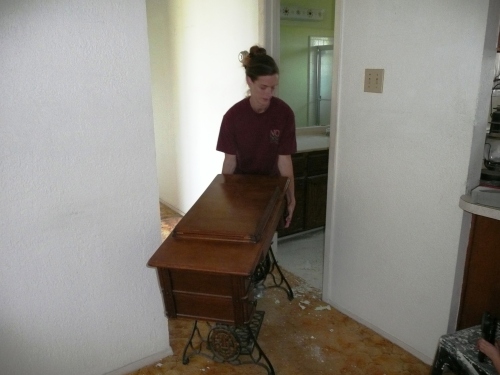
Some things got moved from room to room and back again to avoid having to make sure plastic stayed over it well enough.  One of those was the vintage Singer sewing machine:

Vanessa moving sewing machine

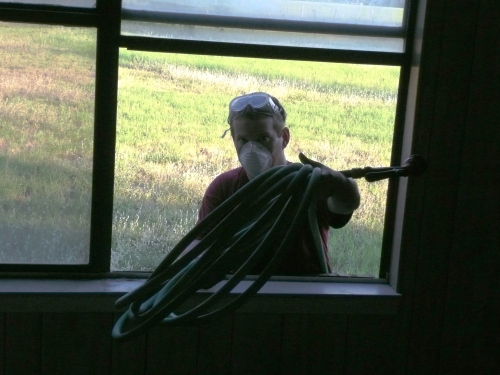
One other thing I did differently than the above tutorials was the sprayer I used.  I didn’t have one of those little garden sprayers, so instead I resorted to this:

Putting hose in the house

Yes, I brought a garden hose in the house.  It works great on the mist setting as long as the nozzle fits tight and doesn’t leak.

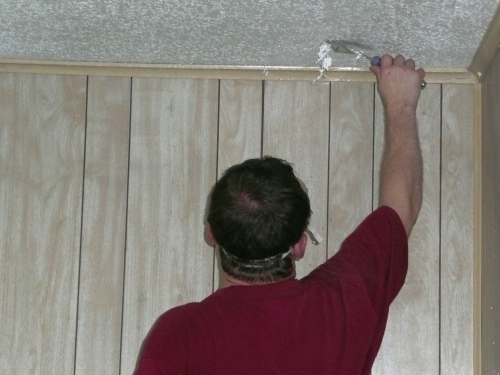
We did have to take one additional step.  Our ceilings had been painted which means the water wouldn’t penetrate the underlying texture very well to soften it up.  One option is to use some kind of chemical stripper first.  I ran across another tip that we used instead.  Just take a taping knife and drag it across the ceiling to knock the tops off of the popcorn:

Preping popcorn texture for removal

We all know how easy those get knocked off.  This would allow the water to get where it needed to be, although it might take a little extra time and water.

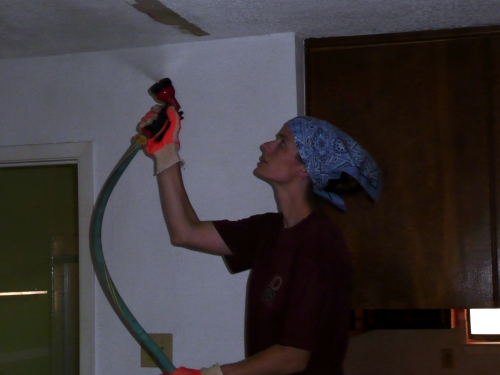
After that was all done, it was time to hose down the ceiling:

Hosing down the ceiling

I would hose down the whole ceiling almost to the point of dripping and then let it soak for about 15 minutes.  Then I would spray down a 5′ section or so and start scraping.  Sometimes I would use the 4″ taping knife and sometimes the 10″ one, mostly for larger open areas:

Scraping popcorn texture

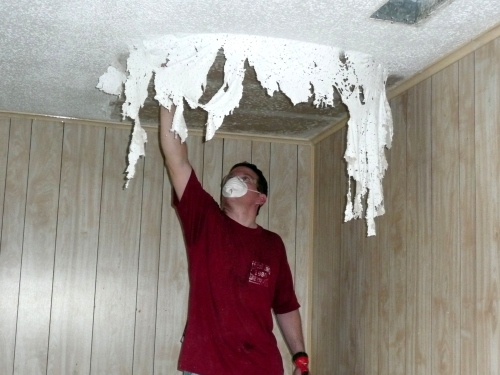
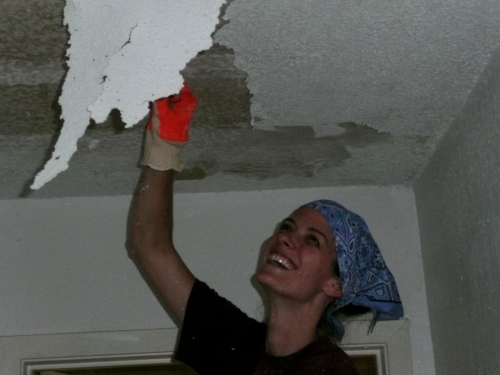
Because the ceilings had been painted, the texture would sometimes come down stuck together in sheets:

Popcorn Texture coming down in sheets

Without the paint, the texture should come down mostly in little granules like you can see in front of my arm:

Popcorn Texture coming down in granules

Vanessa wanted to take a shot at it so here she is hosing down the ceiling:

Vanessa spraying ceiling

She was very intent on this step:

Vanessa spraying intently

Except when she was spraying with her eyes closed:

Vanessa spraying eyes closed

Then she got to scrape:

Vanessa scraping popcorn texture

Also with her eyes closed:

Vanessa scraping eyes closed

I’m not sure why she did so much with her eyes closed.  It’s really not recommended.  It surely doesn’t have anything to do with the guy behind the camera taking pictures at the wrong moment.

Anyway, it really looked like she was enjoying herself too much to be doing something like scraping ceilings:

Vanessa scraping enjoying herself

It is definitely better to wear a mask and safety glasses, but the glasses we had would get wet from the mist and fog up so much you couldn’t see.

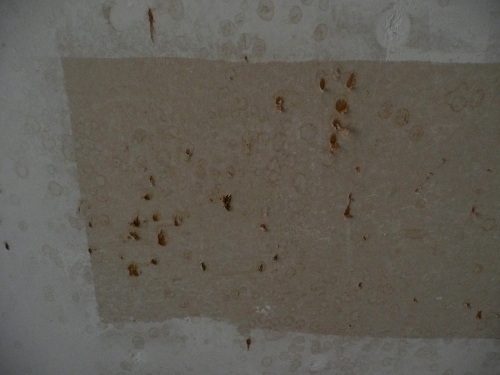
As you scrape, you have to be careful to not tear the existing joint tape, unless you plan on retaping everything, and you want to try and avoid nicking the paper of the sheetroack so you don’t have a ceiling that looks like this:

Nicks in sheetrock paper

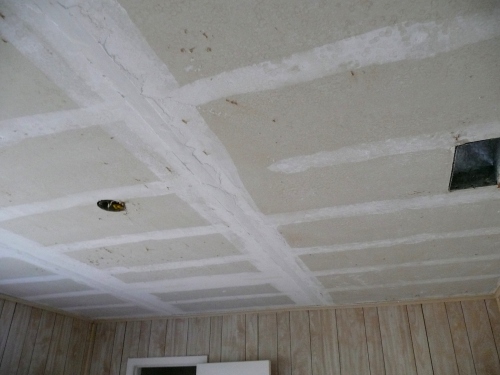
We did run into some difficult spots where the ceiling had been patched at some point.  In those spots there was a layer of mud, then texture, then paint, then maybe more mud or even joint tape, then more texture, and more paint.  This made it hard for the water to penetrate to the bottom layer of texture and usually took extra scraping and spraying..  But after it was all said and done, we had a ceiling freed from popcorn and very tired arms:

Popcorn Texture removed

The last step was to sand down the ceiling with medium grit drywall sandpaper and a pole sander:

Sanding ceiling

This helps eliminate any rough spots and paper nicks in preparation for retexturing or painting.  In our case we also needed to replace a bunch of joint tape that was falling down.  If you have any exposed, it will probably need to be replaced because reapplying mud over the old tape just seems to make it bubble up in my experience.

After everything is finished, you’ll probably have a large mess all over the floor:

Popcorn texture mess in floor

And if you’re lucky, you’ll have a visiting sister to help clean it up:

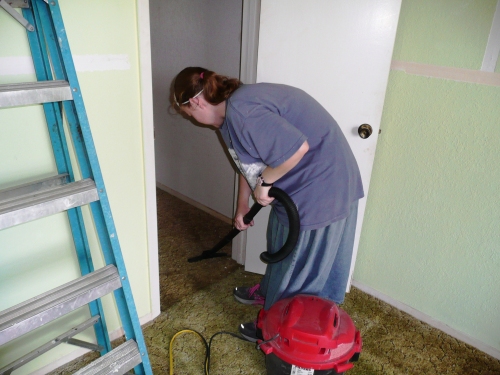
Deva vacuuming

So there you have it.  The old popcorn ceiling is no more, the mess is cleaned up (don’t forget the tops of doors and trim), and it’s on to taping and mudding to get it ready for new texture.  Non-popcorn of course.

Have you ever worked overhead an extended amount of time?  What were you doing and did your arms feel like they were going to fall off before you were done?

Read Full Post »

In this previous post, I asked you to decide the fate of the partial wall between our dining area and living room. Votes are in and the wall won by a landslide. Voters overwhelmingly chose in favor of keeping the partial wall… but losing the spindles.

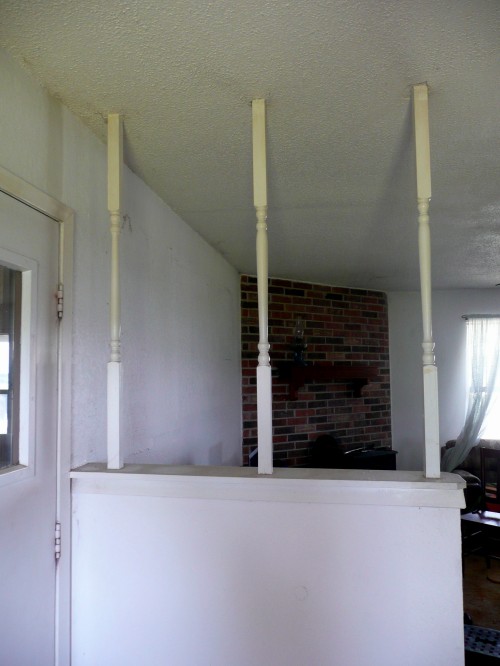
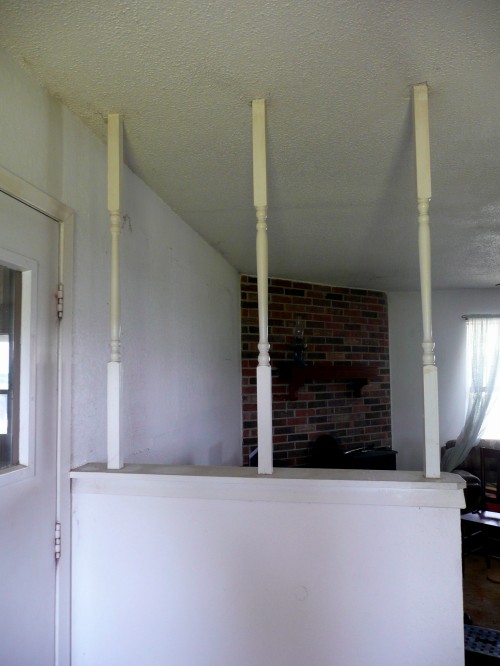
Here’s a picture of the wall to remind you what it looked like before I picked up that sledgehammer:

partial wall

To those of you who said knock out the spindles, you were right. Not only does it look more visually open…

without spindles

… but it was also very fun to do!

swinging maul

I took a couple of decent swings at the first offending spindle and was surprised by how little it cared. It shook a little, but it didn’t budge. I then tackled the upper portions of the spindles. This worked better to loosen them up from the ceiling.

swinging maul at top

Once the tops were free, the rest gave way much more easily. I put a bit more muscle behind my swings and the spindles went flying.

swinging at spindles

When the spindles were out, we removed the nails and gave them to Baz to play with. It was a consolation prize since he had voted against losing the spindles. In fact, he voted to lose the wall and keep the spindles hanging from the ceiling. He also specified that he wanted them painted green, blue and black. But ultimately he was happy just to play with them. Here (according to him) he’s building a tall house:

baz playing

Of course, now we have three nice holes in the ceiling. Danny hopes a mesh patch and generous amounts of joint compound will be sufficient to repair those.

holes in ceiling

I pulled out the scads of nails used to anchor the spindles.

pulling out nails

The top surface of the wall will need a little touching up too, but that shouldn’t present too much of a challenge.

top of wall

The difference doesn’t slap you in the face or anything, but I think the absence of the spindles does help open the space. At the very least, it looks less busy.

partial wall with spindles

parital wall without spindles

I’m envisioning that wall with a splash of color, bright white trim and some fun storage ideas. Hexagonal cubbyholes? Repurposed pallet? Baskets on hooks?

What have you had fun demolishing lately? What wild storage ideas have you tried? What color would you go with on that half-wall?

Read Full Post »

We left off with the shower looking like this:

Shower walls

But of course there’s more to be done. I mentioned before that there are some air conditioning pipes in the way of us raising the shower ceiling.  The AC man, a local church friend, was coming by on Thursday, so we needed to get the ceiling opened up to give him access to fix the pipes.  Also, since tearing out the ceiling and sheetrock was going to create more dust than before, I rigged up some extra ventilation in the bedroom to keep the dust out of the rest of the house:

Window fan

The ceiling tile came down pretty easy with the sledgehammer and crowbar:

Ceiling tiles removed

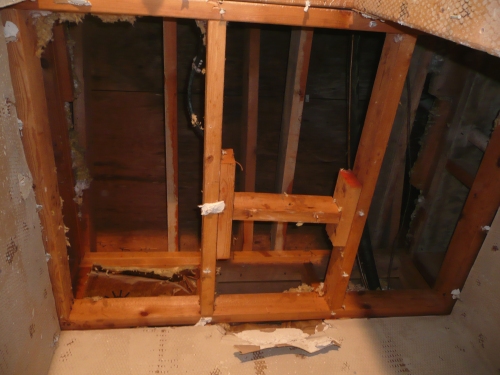
and then the ceiling joists came out:

Ceiling joists gone

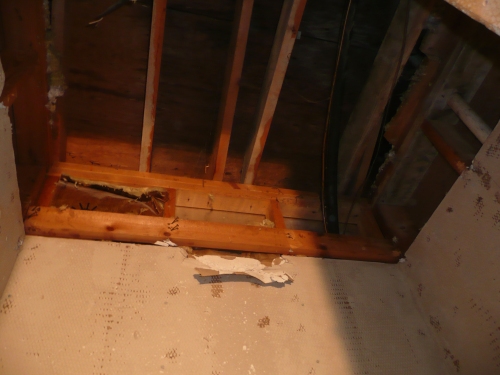
And here’s a closer picture of the pipes that have to be moved to raise the ceiling:

Pipes in way

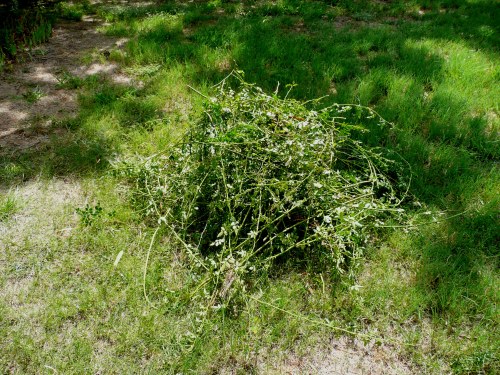
While I was working on demolition, Vanessa asked if there was something she could do.  Why yes, Babe, there is.  We don’t have a good before picture, but the outside AC unit was just about overgrown with a rose bush.  We needed to trim it back anyway for the unit to run more efficiently, but really needed it gone before the AC guy got there so he could work on it.  All the coolant gets pulled into the outside unit so the pipes can be cut to move them.  So Vanessa cut out all this:

Rose pile

and it looks much better:

Clean air conditioner

Thanks for taking care of that in the hot afternoon sun.

Our AC guy arrived shortly after I finished cleaning all the mess out of the shower floor.  The pipes didn’t have enough play to just bend them up out of the way, so they had to be cut and extra pieces added on to get them above the ceiling.  After a little over a half hour or so, it was all done:

Pipes all fixed

Everything’s out of our way and works great.  Thanks Kevin!

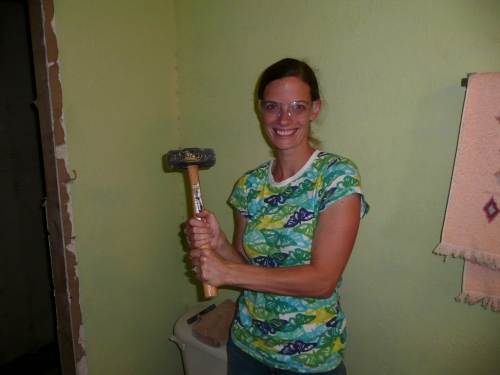
By that time, we decided to stop for the day.  The next day, Vanessa wanted in on the demolition.  Doesn’t she look a little too eager?:

Vanessa eager to smash wall

She started smashing away:

Vanessa hole in the wall

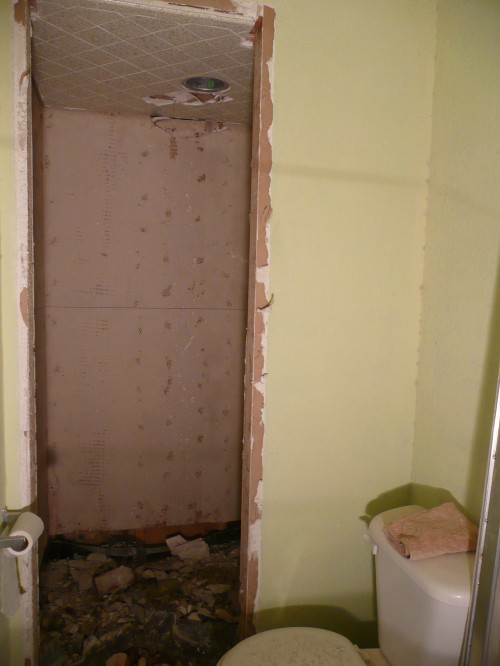
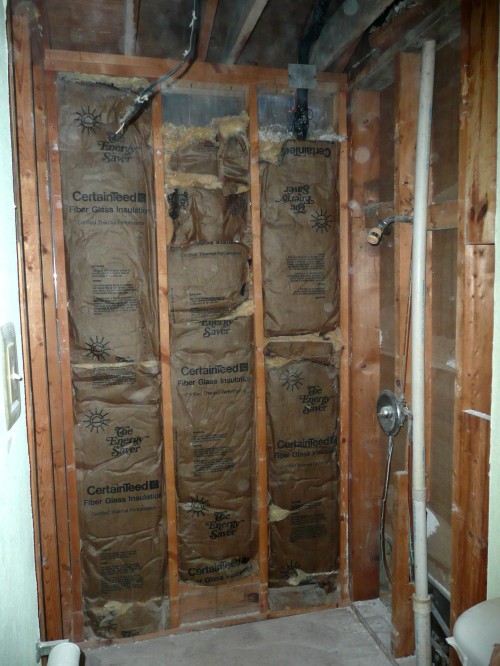
After beating away at it for a while, she went to do something else and I finished up removing the rest of the sheetrock and the little wall.  So here it is, all done and opened up:

Shower walls all down

Doesn’t that just look so much more spacious?

It’s quite the coincidence, but Young House Love (great blog and some of our inspiration for starting this one) just posted a reader submission last week where a bathroom very like our layout had been redone.  The main article is here at ‘tenth avenue south’.  Ours won’t be quite as extensive, but it will still look quite different from when it started.

I also ripped out the old carpet since we’ll be putting something else on the floor.  We’ll probably keep the old carpet pieces since we plan on having a garden and they make for great weed control between the rows.  When you do remove carpet watch out for the tack strips:

Carpet tack strips

The trash pile has grown a lot.  Who knew you could pull this much out of one tiny bathroom:

Trash pile

Finally, I cut a hole in the floor, but more on that later:

Hole in the floor

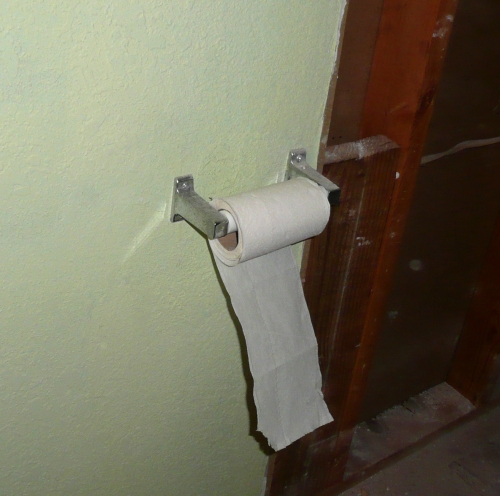
Oh, and there’s this little necessity:

Toilet paper

He’s been here through it all, dust and insulation flying around and everything.  Suffice it to say, we’ll be replacing that as well.  It would probably be like using sandpaper by now.

We’re not exactly sure what direction we want to go with the shower, inserts, tile, or something else, but we’ll let you know when we get there.

What is your favorite shower/bath material?  Tile, acrylic surrounds, concrete, or something else entirely?

Read Full Post »

Keep in mind that your answers mean life or death to this small dividing wall. Your decision could determine if the wall remains in our home or ends up by the road in a pile of spindles and old wood. No pressure.

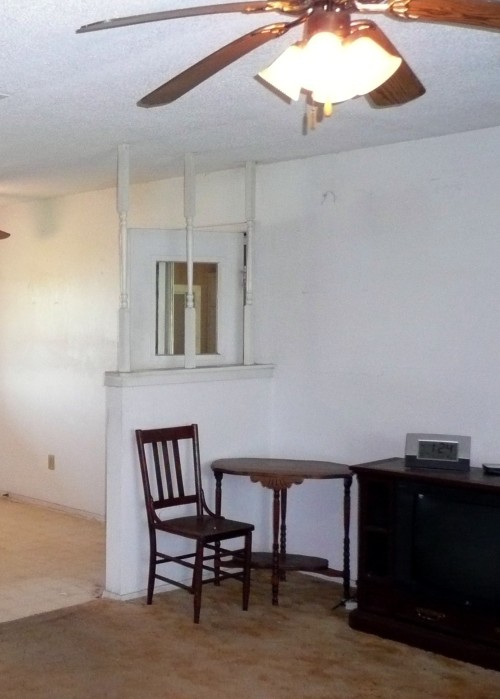
This wall separates our dining room from our living room.

dividing wall

My initial thought was, “That wall has to go.” I think it will open the space between rooms visually and just give us more room to maneuver.

Danny thinks some clever use of baskets or shelves could make a handy catch-all area. We definitely need a catch-all. The corner of the dining table or the kitchen island usually become the catch-all.

My sister thinks we should leave the wall and use some funky paint to play up the retro vibe of the spindles. I will also take suggestions on color choices.

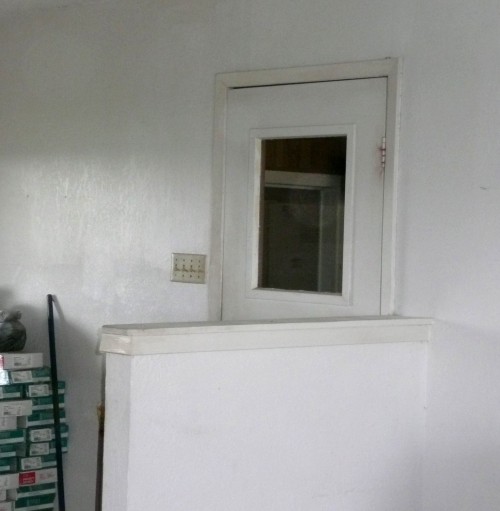
Here’s another view of the wall:

divider

So, my friends, it is now in your hands. What would you do with this wall? Keep it? Color it crazy? Or knock that puppy out?

Have you ever had a wall or partial wall you just weren’t sure what to do with? Did you remove it? How did you handle it?

Read Full Post »

Where did I leave off?   Oh yeah, I had just finished busting up the last layer of the floor and got down to plywood.  Naturally, it’s time to work our way up.  But first a bit of investigating.

Since one of the things we want to do is raise the ceiling in the shower and open it up, I headed into the attic to see if there was some structural reason the ceiling was low.  This of course is best done early in the morning when temperatures in the attic have not had a chance to climb much since they can quickly reach 130° and above.  I’d probably melt into a puddle of goo.

Our attic has a fairly gentle slope, probably a 4/12 pitch or less.  This means it rises vertically four inches for every 12 inches horizontally.  The higher the first number the steeper the roof.  While a gentle slope is great if you have to be working on the roof, it’s not a great if you have to work under it.  That’s because you have less clearance to walk in the middle and it’s harder to get to the outside walls since the roof is so low.  Suffice it to say I had to walk hunched over while stepping over heat and air ducts and dragging a light with me.  Then I had to get down on my knees and almost flat on my belly to get to where I could see and keep my back off of the thousands of nails sticking through the roof decking.

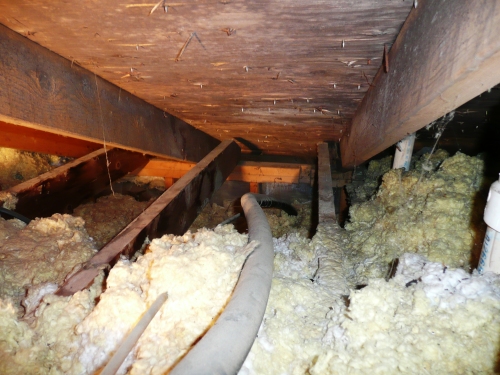
Finally, I got a better view of the area above the shower and saw this.
Air conditioning pipes in attic
That shows someone took a shortcut.  You can see where the top plate of the wall had been notched for the air conditioning pipes to pass into the wall, but since the ceiling was lowered they just ran them through the empty space.

That can be fixed.  It means some extra cost, but it doesn’t look like there’s any big reason we can’t raise the ceiling.  Also, the rafters don’t have a support coming down on top of the inside shower wall and the rooms on either side span the whole distance from outside wall to hallway without support so it doesn’t look like the wall is load bearing.  That’s a relief since it means we can open up the shower by taking out the wall.

Back down from the attic, I still had to take care of the trashcan full of stuff and the mess I left in the shower floor the last time.  So, I started a pile outside:

Trash pile

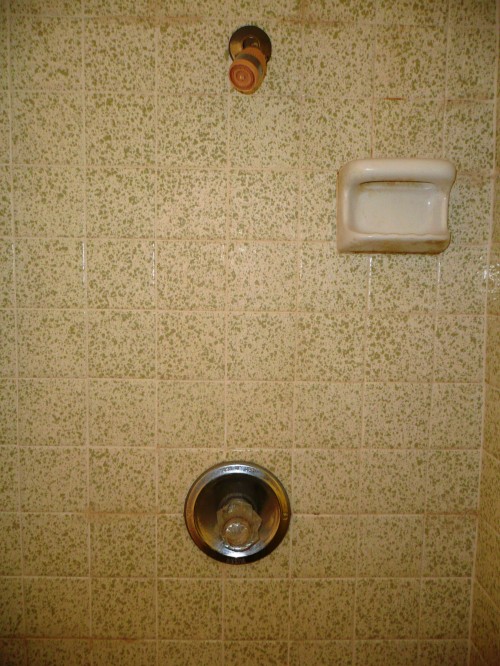
Now, down to business.  First off, you want to remove the old show fixtures to get the tile out from behind them:

Shower fixtures

If you have a handle like ours, the center will pop out and there should be a screw under it to take off the handle.  Then there’s two screws on the big flange to remove and that should expose everything.  Hopefully they will be easy to remove.  One of ours must have rusted and it wasn’t going to come all the way out so I just had to pull it out as far as I could.  I also did that around the shower head:

Shower fixture plates

Typically, a shower won’t have a shutoff valve like you would see under a sink or toilet so you have to shut the water off to the whole house instead.  That’s why I didn’t remove the shower head or force things with the screw.  I want to see what is going on behind the wall as I remove them to hopefully avoid any problems although it did make things a little more difficult later.  There shouldn’t be any issues since there is no water at the shower head and the screw should go into a separate fitting.

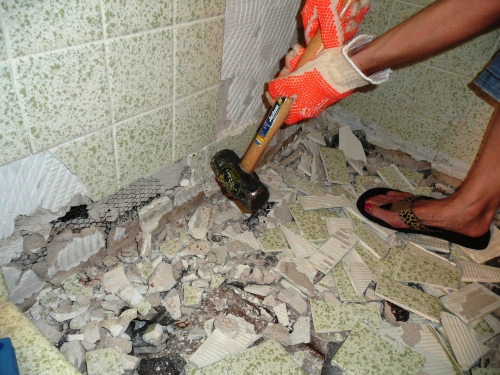
On to the tile removal.  It’s really just the same sledgehammer and crowbar-as-a-chisel method as we used to remove the floor tile.  Vanessa wanted to get in on the action so here she is demonstrating this time:

Vanessa removing shower tile

Don’t break too many, babe.  Maybe we can sell them on Craigslist.

If they are not coming off easy, you’re not worried about saving whole tiles, or for no other reason than you just want to, you can always just take a sledgehammer to them instead.

Vanessa sledge hammer tile

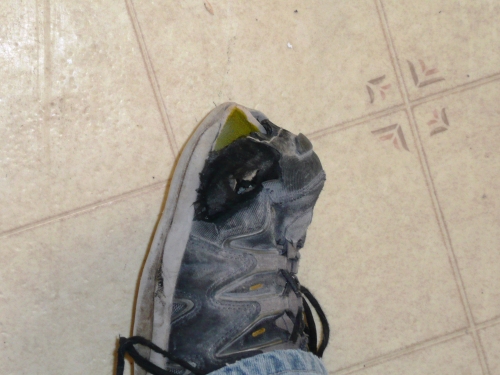
Do notice the nice hammer swinging technique.  Ignore the inappropriate footwear that Vanessa has chosen for this demolition.  Not sure what she was thinking.  Although, to be fair, mine’s not a ‘hole’ lot better:

Shoe hole

Vanessa tired after a while so Baz had to step in and help Mommy out:

Baz removing tile

After trying with the sledgehammer a couple of times, he had to switch to a lighter one.  Oh and his faucs (faux crocs) are probably not the best footwear either.

After plunking away at this for a while, all the tile has been removed and we’re down to the layer below:

Shower tile removed

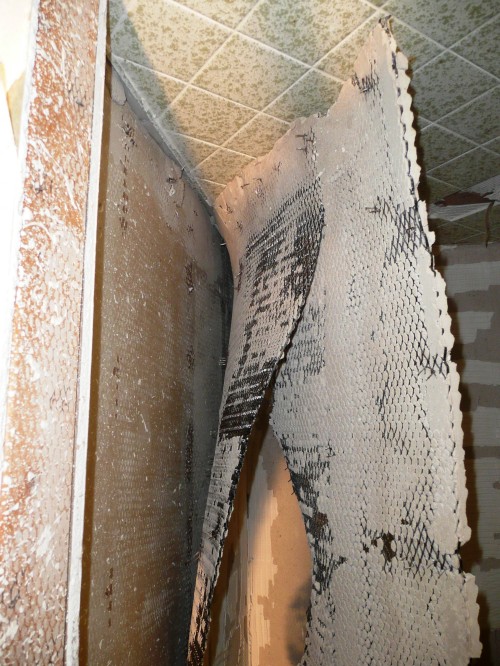
Most often nowadays this layer will just be sheets of cement board installed like sheetrock.  This helps to provide some waterproofing and a surface for the tile to adhere to.  On some older homes like this one, they used a wire mesh with mortar applied over it for those functions.  You can see it peeking through at the bottom of the back wall.  Removing this was one of the harder tasks but it can be done just like the tiles or you may be able to pull it off after getting started.  It will probably come off in sheets:

Mortar backing

These were pretty heavy and hard to handle so I just took the hammer or the crowbar and knocked as much of the mortar off as I could to make it light and able to fold up the mesh.  This is where I ran into some more issues since I didn’t completely remove the flanges around the fixtures.  Instead of just being able to pull the mesh off the wall, I had to cut it to get around them.

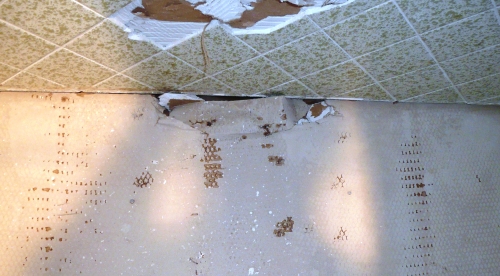
After removing all this, I finally made it down to bare sheetrock:

 Down to Sheetrock

 It’s not in such good shape:

Top of shower wall hole

It’s also not water proof, so all the sheetrock will be coming down too.  I did leave the ceiling tile up for now.  Since it is applied directly to the sheetrock, there’s not a hard surface on the back of the tile and the crowbar kept breaker through the sheetrock.  Tearing it out now would have opened it up to the attic and let down all the insulation on top of it so I’ll wait until the air conditioning guys are going to come and fix the pipes.

We’ve had another casualty.  This time it’s my glove:

Glove holes

It apparently couldn’t take all the rough and sharp mortar, tile, and metal.  RIP glove fingers.  At least it came with the house.

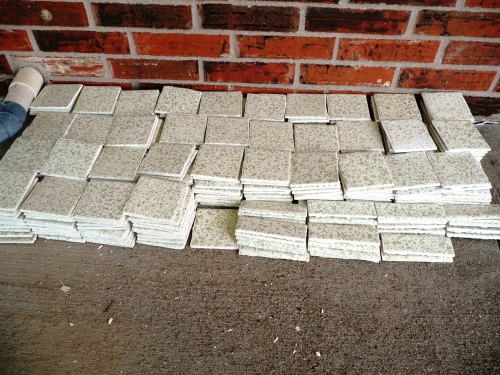
All said and done, we ended up with a little over 340 unbroken tiles:

Reclaimed tile

Yes, I’m going to put them on Craigslist and see what happens.  If they don’t sale, who wants a dozen or so vintage tile coasters?

Oh, one last thing.  We got our first mail at the new house!:

 First mail

Granted, it’s just a letter from the insurance company, but still.


What’s the most fun you’ve ever had with a sledgehammer?

Read Full Post »

First of all, let’s get on the same page here.  We’re talking deconstruction as the opposite of construction, sort of like adding a little bit more to destruction.  It’s a word Baz came up with.  However, deconstruction actually is a word.  It’s described here.  Yeah, that description didn’t help me much either.

So here’s where it all happens.  The master bath.  And, yes, that’s about as much of it as I could get into the picture.
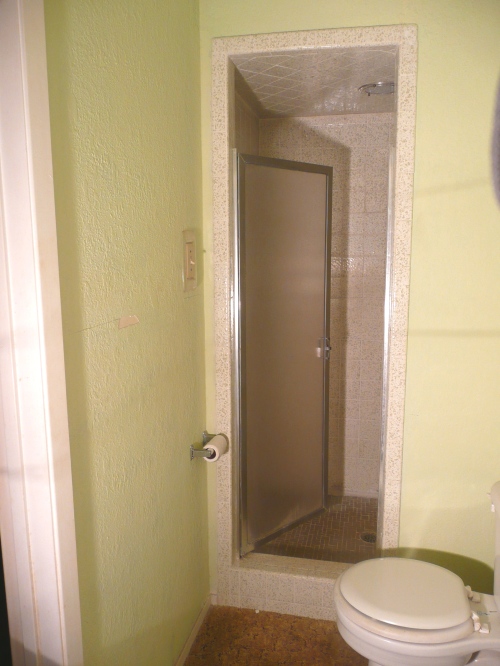
Master Bath 2

Isn’t that shower just cute, quaint, and cozy?  More like dark, short, and closed in.  Also, it’s a likely culprit for the rotting of the sill plate that we mentioned in this post.  So, we decided that we need to tear out the tile and fix things up to prevent leaks in the future.

What’s that, Jane?  “Take picture me!”  OK…. Look closely and you’ll see that she has a big pink cast on her left leg. She’s been tromping around our remodel efforts in a cast that is probably now filled with dust. Vanessa is thrilled.

Take picture me

The place I chose to start was tearing out the tile on the shower floor.  I wanted to get down to the subfloor and see if there are any problems that need fixing.  So I gathered my tools.
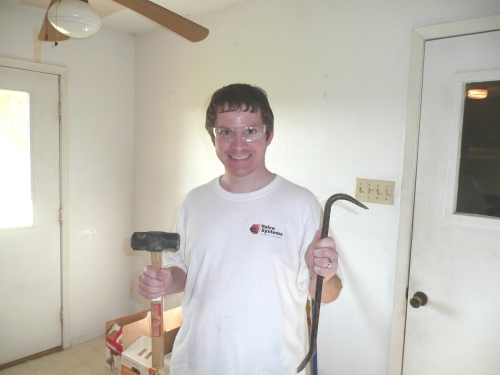
Ready Tools sledgehammer crowbar

Surprisingly, this smile actually came out looking real and normal.  I was trying to put on a goofy cheesy smile.  Maybe I should do that more often for pictures and they’ll come out better.

First though, I had to get this out of the way:
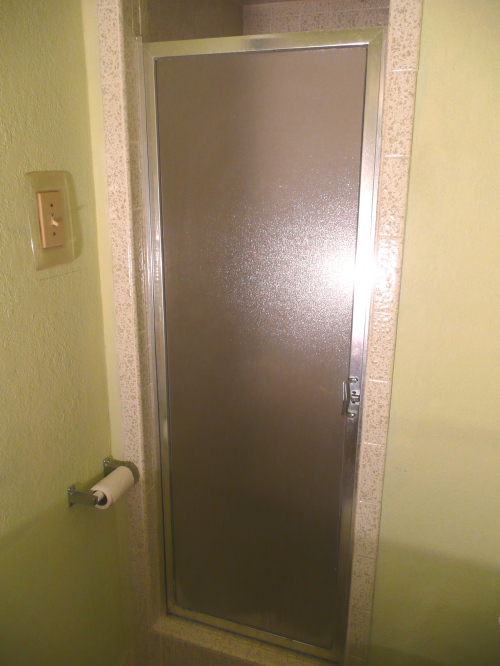
Shower Door

Easy enough, there were two screws on one side and three on the other.  Just grab the screw gun and go like so:

Removing Shower Door

Yeah, I know, it’s crooked.  We’re still working on getting better pictures taken and playing with the camera so the flash doesn’t wash things out, so from time to time you might see pictures at odd angles or things cut off at the wrong point like this good one of the sledgehammer on the crowbar but not much else.
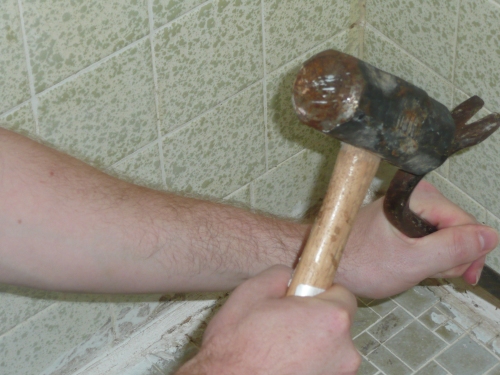
Sledgehammer and crowbar

Back to the deconstruction.  I could just write and answer all the questions that Baz was asking and you would have a complete step by step of what was needed and why, but for brevity’s sake, I won’t.

On the door and frame, you’ll probably run into some silicone or caulk along the edges to keep the moisture in the shower.  I just cut through that with a standard box knife down the whole length of the frame.

On the bottom screw on the door side, I also ran into another issue since it was so rusted the screwdriver couldn’t get any purchase.  Since we are planning on tearing out the tile and all, I just grabbed a drill bit and drilled out the top of the screw till it broke off.  If you are just planning on doing something like replacing the door, you can use a screw extractor which is made to burrow down into the metal to grip and remove the screw so you can still use the hole.

After the door was off, into the shower I went.  Since there was so much caulking around the edge of the floor I removed some of it to get to the edge of the tile.  I started off using an olde putty knife (yes it was probably old enough to justify the ‘e’ on old), but noticed it was beginning to break so I resorted to the tried and true hammer and screwdriver-for-a-chisel method.
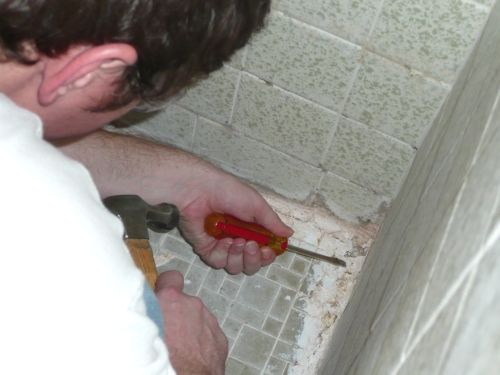
Removing Caulk

After removing some of the caulking and finding a good spot to start on the tile I switched to the sledgehammer and crowbar-as-a-chisel method for removing the tile.  In this method the straighter edge of the crowbar is to be placed at the base of the tile and the curved end is to be struck smartly with the sledgehammer (reference earlier hammer and crowbar picture).  Proper crowbar positioning is shown, the rest is up to you.  Ear protection, safety glasses and a dust mask are also recommended since there will be lots of noise, flying pieces, and plenty of dust.  And watch out for missing the crowbar and catching your thumb between it and the hammer handle.  Yes, I know, Dad, you’re not supposed to miss.  It only happened a couple of times.

Removing Shower Floor Tile

You can also see that I put some masking tape over the drain to keep chunks of anything from falling down into it.

I’m sure there are other tools that might remove tile easier or more professionally, but we didn’t have any of them on hand.  Small tiles like this come up fairly easy and quick and before long I had a pile in the bottom of the shower.
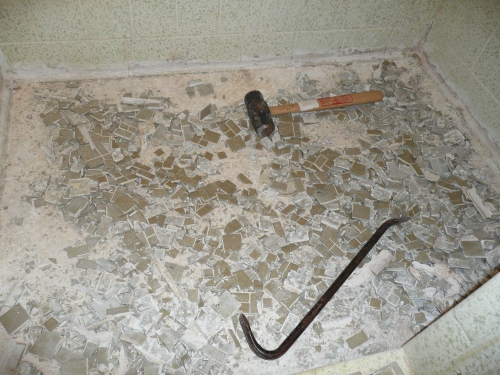
Floor Tile Chipped out

Then I recruited some help to clean up.

Baz Helping

You can also see that I added knee pads to my gear.  Kneeling on a bunch of chipped out tiles is not too fun.

One layer down, more to go.  Underneath the tiles is a layer of mortar.  This helps build the floor up to the needed height and create a slope to the drain for the water runoff.

Down to mortar-thinset

Along the edge of the floor, the mortar was up to four inches thick.
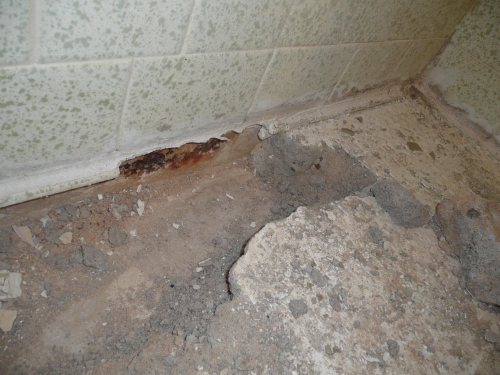
But it also came up fairly easy using the same hammer and crowbar method or sometimes just a sledgehammer to the top and I was soon left with a nice pile of rubble in the shower floor.

Thinset rubble

I thought about leaving it and using it as the new shower floor.  Those natural looking rock ones seems to be in right now and it would also act as an exfoliater for the feet.  But I figured Vanessa wouldn’t go for that so I cleaned it all out and filled up a 20 gallon trashcan which I could hardly move at all.

Full trash

Two layers down, more to go.  Underneath the mortar was another layer of mortar/leveler.  This is used to make things even and provide a base to build on.  You can also see some rust stains around the edge which means there has been some water or moisture getting back there.  This layer was mostly less than an inch thick, but it was stuck to the top of the moisture barrier and didn’t come loose easily making it probably the hardest layer to remove.  I found that cracking the top with the hammer and pulling up the moisture barrier with it worked best.

More mortar-thinsetFour layers down (if you count the moisture barrier separate) and we’re down to bare wood.

Down to wood shower floorI didn’t get everything cleaned out of the floor this time since the trashcan was full, it was late, and I decided to wait until another day.  One thing to keep in mind at this point is the drain.  If everything has been removed, the drain might not have much support and stepping on it might cause things to crack underneath.  So be careful and avoid larger problems.

So there you have it.  Phase one of the shower deconstruction.  Oh, we did have one casualty though.

Dustpan CasualtyOur beloved dustpan developed a hole.  This was one of those with the nice handy little broom that snapped into the handle.  We used it often (I’m actually still using it on the rest of the shower, but I don’t expect it will make it back to general use.)  RIP little dustpan, we’ll miss you.  Come to think of it, I guess this was actually one of my mom’s dustpans that we borrowed indefinitely because Baz liked to play with it when he was smaller.  Oops, sorry, Mom.

There was actually another casualty, but I didn’t think most of you wanted to see a picture of the squished spider that was on the trashcan before I brought it in the house.

Stay tuned for more shower deconstruction.

Have you ever completely ripped out the old tile in a shower/tub?  What did you replace it with?  Tile?  Ready made surround?  Other?

Read Full Post »