Drywall mud that is. Joint compound. The stuff that covers up all the joint tape and nails. Now that we got the ceilings all scraped and sanded, it’s time to fix it all back up. This post is about more than just the ceilings, though. In fact, most of the pictures are of working on the walls which I was doing at about the same time. The ceiling work happened mostly at night when Vanessa and the kids were back at the other house and it’s kind of hard to take pictures while holding a mud pan in one hand and using a taping knife with the other. We haven’t sprung for a camera upgrade and tripod to do that yet.
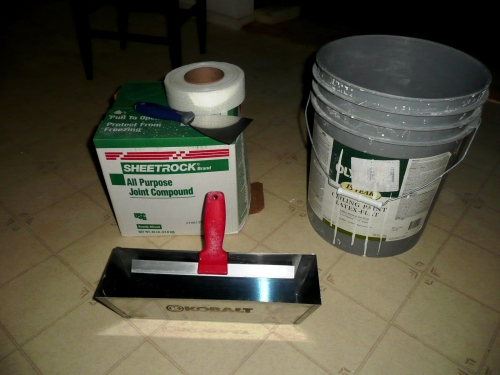 We have:
- a box of joint compound
- stainless steel mud pan
- 4″ stainless steel taping knife
- 10″ taping knife non-stainless, but cheaper (more on that in a bit)
- joint tape
- a bucket for mixing
I would probably recommend getting an 8″ taping knife and a 12″ one instead of just the 10″. That would allow layers to be put on in increasing widths a little easier from my short experience, but professionals may have a different opinion. Go ahead and spend the extra money and get the stainless steel ones if you’re going to be doing a lot of mud work. I got the cheaper 10″ knife and it didn’t take long to start developing rust spots. So far that hasn’t affected anything though. Avoid the plastic ones if you have much to do. They don’t hold a nice edge very long.
I went with the regular weight joint compound in the 48lb boxes. There’s other choices such as light weight and light weight with reduced sanding dust, but the regular weight is still what most of the pros use. It also comes in a 68lb bucket, but I noticed that is was actually cheaper per pound to use the boxes since I already had a bucket to put it in.
One thing I did do different than most of the pros probably would (besides do a nice job) was that I used the self adhesive mesh tape instead of the paper tape. I’ve used that paper tape in the past when helping my dad on their house, and I just don’t have the hang of that very well. Since I was also going to be working on the ceiling, I wanted something I could stick up there and stay rather than having to get it to stay with joint compound. This did make it easier for me except that you can’t bend it in half to do the corners like you can the paper tape.
We’ve mentioned before about the cracks in the joints in the walls as well as how it’s hard to just go back over existing paper tape, so that means quite a bit of the wall joints and corners got retaped. First step of course is to peel off the old tape and mud. Then it’s time to put the new tape on:
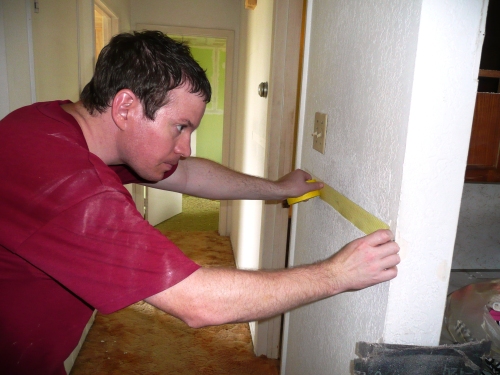
One thing that made it easy on the walls it that there was usually this nice little channel that the tape could fit in and then you could just fill that channel with mud instead of having to feather it out like a joint on a bare wall. You want to make sure that it’s pressed down tight:

And then just trim it off with a box knife:
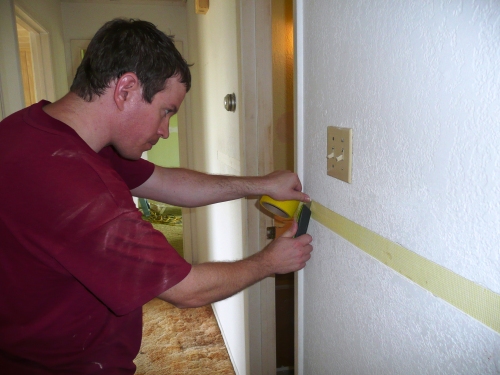
Once it’s all in place, your walls may be framed in yellow (or green or white depending on which tape you get), but it’s time to mud:

Like I said, the walls were fairly easy since there was a nice channel to hold new mud. I just smeared a bunch on:

and smoothed it down:
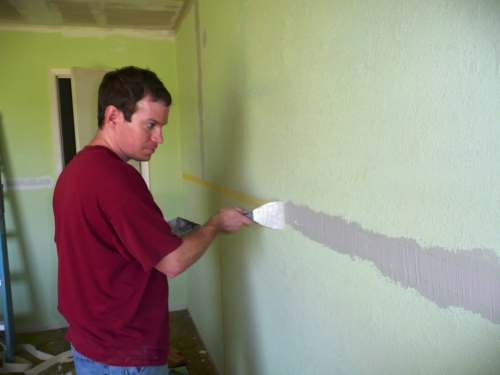
The corners are a bit more involved. Many tutorials say to do one side and then do the second side when the first is dry (usually the next day). This keeps you from messing up the first side as you’re spreading the second. I did do that on the corners where the ceiling meets the walls, but since we are going to texture the walls anyway, I just did both sides on a wall corner:

It’s actually a multi layer process. The joint compound will shrink as it dries and will probably need a second or even third coat depending on how deep the area is. It can also crack as it dries if it is too thick.
That was the easy part. The ceilings took a lot longer. Since they had a lot of the old mud scraped off, there weren’t nice little channels in most spots. Also since we weren’t planning to put as thick of a texture on them, the joints needed to be smoother and flatter (ideally) to avoid seeing any humps in the finished ceiling. The way this is done is to apply multiple layers, 2-3, with each layer wider than the last and thinning out to nothing at the edge. That’s why there’s a need for multiple sizes of taping knives. It’s easy to explain, but hard to execute to perfection. And I didn’t. My biggest challenges were getting the layers wide enough to smooth out the humps and avoiding waves in the mud as I blended it back into what I just applied.
Working on the ceiling is even more challenging in that it’s working above your head. You can see I’m working on a final layer about 18″-24″ wide:
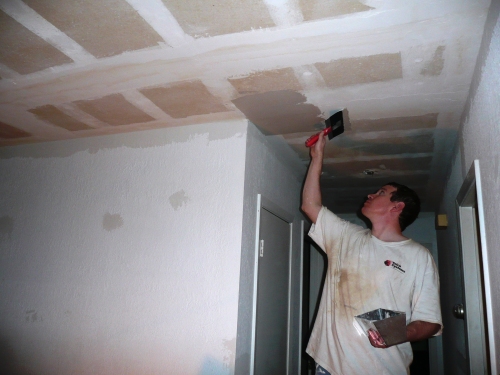
Most pros will strap on a short set of stilts to walk around on or use some scaffolding rather than a step stool.
In addition to all the joints, you’ll want to make sure to hammer in any loose nails (or better yet use screws) and fill any nail dimples that need it. For a completely smooth look, the last step is to sand it down. It shouldn’t take much. If you sand too much you can fray the drywall’s paper backing or even get into the tape. You can also “sand” with a wet sponge since the joint compound is water soluble.
After it’s all said and done, it should look something like this:
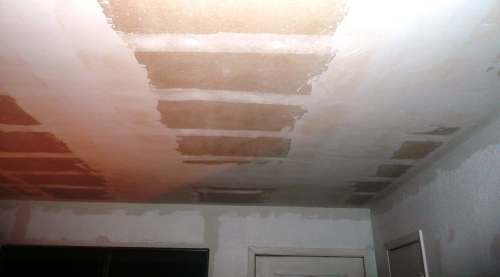
And my arms were tired of working above my head. It would get to the point where I was even struggling to put enough pressure on the knife to smooth out the mud without dropping them down for a few seconds. I told Vanessa that I wasn’t going to lift my arms above my head for a month after I was done. But, I guess that’s what working a desk job will get ya.
After several nights and a couple of days of scraping and mudding, we’re finally ready to put some texture back on.
Have you ever redone any drywall mudding? How did it turn out?
Read Full Post »
